MavRic's Cocoon - New thread

felixrosbergen

Senior Member
Hi All,

I have started this new thread because the old was a bit unorganized. I wanted to present the info on my HA efforts in the most organized way possible to hopefully provide maximum benefit to fellow cocooners and thus try to give back to this community from which i have gained so much myself.

It is a continuous work in progress and servers as both a blog and an overview. Below is an outline, not all the pieces are there so check back later if what you're looking for is not there. I'll be using shortcuts in the outline beflow to link to the relevant posts.

The follwoing section will be created, I will create seperate posts for most section so that things don't get out of control:
- The house - Link
----- Description / Plans
----- General Lessons learned on getting a new home built
- The HA Vision - Link
----- HA Goals
- Pre-wire / Wiring method Link
----- Strategy
----- Use of conduit
----- Patchpanels
----- Interaction with builder/developer/electrician
----- Tools
- Wiring labelling/identification method
----- Wire labelling convention
----- Wire labeling physical method
- Subsystems and Equipement
------ Server (Windows Home Server)
------ Top Level Integration (not done yet, but CQC planned)
------ TV/DVR solution (SageTV)
------ Security/Automation (ELK)
------ Lighting (ALC - in progress)
------ HVAC (Aprilaire, planned)
- Lessons learned
 
THE HOUSE - Description:

The house is in SouthWest Connecticut close to the border with New York State. It is 2 story with full basement. The ground floor is 1340sqf (excluding the garage) and the 2nd floor is approx. 1575sqf. The 2nd floor is bigger than the ground since we built out part of the space above the garage as a laundry area. There is still about 200sqf of unfinished space above the garage which can be finished in the future. The basement is a walkout basement with french doors and window and is 1340sqf like the ground floor.

The structure of the house is all wood, besides the exterior walls there is not a singel load bearing interior wall in the house. There are a few locations where double 2x4's function as columns. I was told the developer was flexible on the layout and since there were no real load bearing walls I was free to adjust the layout as long as i didn't change the exterior. WARNING TO ALL BUILDERS: Don't tell a engineer customer he's free to change the design. I poured over the plans with my fellow geeks and co-workers and we came up with the layout as shown below.

The key difference from the standard layout are:
- moved the laundry room upstairs, created space for a much bigger kitchen/family room area.
- increased the master bedroom walk in closet size and made it accesible from both bathroom and bedroom. Now that we're moved in we much enjoy this since the wife and i get up at diferent times so you can wash and change without disturbing the other but if you need to change clother during the day you don't always have to walk through the bathroom.
- Increased the shower size to 3x5 and put a 2nd showerhead in.
- Made the tub 6' instead of 5', this now confortably fits 2. (we have a 19" TV on the wall in the bathroom).

The drawings below reflect some but not all of these changes since some were done on the fly while framing was in progress and it apparently didn't affect the permit so the builder never updated the drawings.

The house is being built by a developer as part of a development that consists of 10 homes on a total of 12acres of land. Each home is on a 1 acre lot except for one lot which is 2 acres and there is some space lost due to a pond. While i guess this could technically be considered a 'tract' home the developer and the company that the devloper contracted to actually build the home are essentially the same people (each development is it's own 'company' for tax/risk reasons) so they were quite flexible, in these econmic tougher times (2008) they also seem to be quite willing to work with you if you're crazy enough to buy a new construction home.

THE HOUSE - Plans

Ground Foor Plan
BETA22.jpg


2nd Floor
BETA23.jpg


Elevation
BETA11.jpg


THE HOUSE - Lessons learned:

The following are items worth noting in my opinion as words of advice to fellow cocooners that are having a home built. Now that we are moved in I love the house but there are a few things i may have done differently or thought about but didnt do for budget or other reasons.

- Heated floor in master bathroom. They gave us an optional price of $1500 for this and we passed, but now regret this since the floor is quite chilly in the winter. This bathroom is also on the 2nd floor. If you had a bathroom on ground floor i woudl certainly do this.
- Insulated garage. We considered this and stupidly passed on a $500 upgrade cost. Since you cannot (or shoudl not) remote start a car while in the garage we now drive away from home in the mornings with cold engines which is not good for the cars. Not sure how much insulation woudl have made a difference since there is no actual heating the garage, but i'm sure i would have done something. Also heat is relatively easy to add later (electric or gas heater) but if the walls are not insulated it's throwing money out the window.
- Carefully consider your laundry closet if you have them in a closet. The newer front loading washers and dryers are quite deep and the builders 'standard' laundry room dimensions were very very marginal. We're talking .5 to 1" of play here. Check the specs on your washer/dryer and don't go by the overall dimension but use the installation guide which usually have a different set of dimensions that take the space for dryer hose conenctions and such into account. We got very lucky here things fit.

Contractual issues:
- Try and find a good balance between the level of detail in the contract document. If you ask for too much detail each thing you change during the building will likely cost you. If you don't ask for enough detail you may end up with something you don't like and not much you can do about it (except pay to have it exchanged).
- Try and put a delay damages clause in the contract. My builder wouldnt sign up for that, but i think if i pushed enough they may have.
- Set a realistic time schedule. I had a 6 month planned construction period which seemed tight and then they lost almost 2 months due to delays in getting the permits. (The city building department is slow and the builder can't do mcuh about that). For a 2 story house construction during summer/fall anything less than 6 months seems entirely unrealistic to me since they worked on my home 6 days a week for 6 months and still needed 2 months more to finish it.
- For any changes (and believe me you will want to change things during construction) get written proposals and price confirmation. Most of the time I did things verbally over the phone and it mostly went well, but there was a few instances where apparently we 'misunderstood' each other and the price given was per unit instead of the whole thing or similar things like that.
- For a new construction home expect to spend at least an additioal 5% of the purchase price on upgrades/changes. If the base purchase price stretches you budget you're in for trouble. You'll really hate yourself when you have to settle for the cheaper countertop/foor/etc as opposed to what you really want. We didnt get into this situation budget wise, but once it was all said and done we did spend a lot more on changes/upgrades than we expected (about 7% of the purchase price).
- Ask the builder to get confirmation from you before proceeding with certain things. I came to the site one day and found the water well dug and underground gas tank put in and while OK with a little more planning and thought the locations could have been better. A builder is more likely to put these things in places where it's convenient for him (e.g. short gas line runs, etc) rather than good for you for the next 20 years.
 
"Insulated garage. We considered this and stupidly passed on a $500 upgrade cost. Since you cannot (or shoudl not) remote start a car while in the garage we now drive away from home in the mornings with cold engines which is not good for the cars. Not sure how much insulation woudl have made a difference since there is no actual heating the garage, but i'm sure i would have done something. Also heat is relatively easy to add later (electric or gas heater) but if the walls are not insulated it's throwing money out the window."

I disagree with this. You want your garage as cold as you can get it!

At least where I live, they salt. When salt gets wet...and warm, it eats metal. That's why I don't do anything (washing) to the car, until it starts to warm up. Then I take the car for a bath.

So, if you had an insulated garage (and since it's a new garage it probably doesn't have vents?), the heat from the engine block would be enough heat to warm the garage a few degrees, which combine that with the snow stuck to the bottom of your car, with the salt in it and bingo...you have a bad combo. for your car.

Besides, if you are keeping the car in the garage...just go out there start it with your house shoes on...then on your way back INTO the house, hit the garage door opener.

Then your car will be toasty warm when you are ready to leave!

JMO

--Dan
 
Nahh...then I have to worry about the blue-hairs, as well as worrying about getting my house sprayed for BUGS every month.

Then there's that pesky heat! Too much of it!!!

Besides, the wife and I like having all 4 seasons...

--Dan
 
On the garage issue it seems that in Connecticut it gets cold but not cold enough to get keep a garage below freezing at all times. Even with it not insulated now there is a puddle of water under my car in the morning when the snow/ice has melted of it. So if it's going to do that anyway i might as well keep the car warm too right? Maybe i'm missing something.

I get my car washed in the winter with a good undercariage spray so that all the salt and nastyness is complety removed...

I thought warming up the car in the garage even with the garage doors open still was generally not recommended? Since the ceiling is higher than the top of the overhead door i would imagine fumes woudl still accumulate there.
 
THE HA VISION:

OK, so whats my grand plan? Well..i don't really have one but as most of us i don't want to be limited either.

Generally I don't want a house that is too geeky, it needs to be convenient...having 4 remotes on the couch that are all needed just to watch TV doesn't fit into that picture.

Everything has to be pretty stable/reliable as well, i travel quite a bit for work and am often gone for a full week or 2 weeks. The wife insisted on an alarm system which is great since it is going to be the basis of a lot of the automation.

In the near fututure i want the thermostats tied into the automation and some of the lights as well so that I can have a 'go to bed' button and eveything goes down.

I spent a lot of time reading these forums and the Wiring 101 guide. While this was all great info i had a hard time justifying pre-wiring for some of this stuff. If you pre-wire for automated shades but then add up how each each shade is you'll quickly determine that maybe you won't be having each shade in the house automated. With a full basement and a full attic and 2" conduits between the two i figured it was pretty safe and with some effort i will be able to get wiring to most places I want.

Generally i want things hardwired or wired of some sort. While wireless stuff seems to have become quite reliable i see it as a great tool when you cannot get a wire somewhere. At the moment i don't even have wifi in the house (the 5 year old wifi router broke and i replace it with a hardwire only VPN router and haven't gotten a WAP yet).

I'm a neatfreak and OCD (probably like most of us here) so keeping everything organized and document is a big thing for me.
 
PRE-WIRE / WIRING METHOD:

If you're getting a house built talk to your builder to see what if any pre-wiring you can do yourself. If you're the one carrying the insurance,etc you can probably do a lot but if you're working with a developer of some sort you're likely very limited.

I was working with a developer who was very flexible dealing with my wishes, but i couldnt do any of the actual work. This means you're not just paying for the cable but also for a professional to install it. Rethinking of how much pre-wiring you want to do seems a good idea once they give you per run prices, etc.

-ALARM/AUDIO/THERMOSTAT

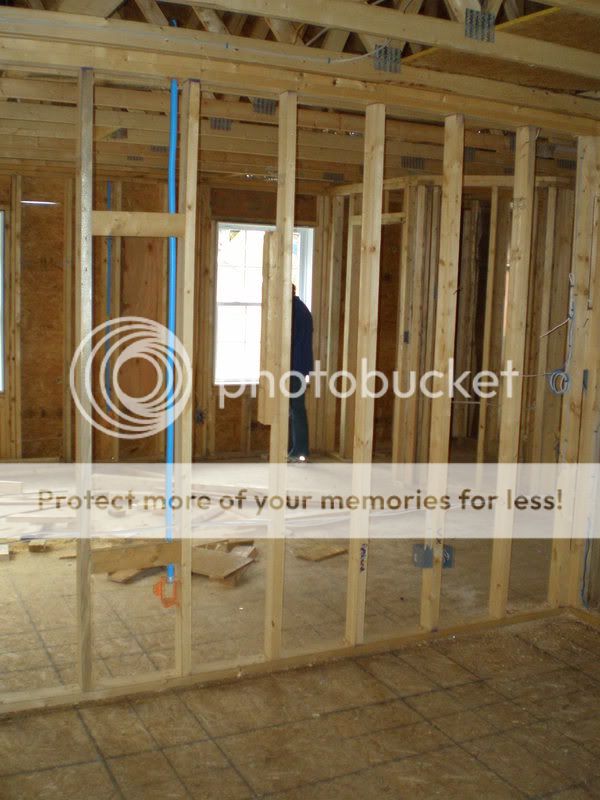
I had a LV contractor prewire all the ground floor and basement doors and windows and install the recessed sensors. What i didnt realize untill it was too late is that my windows are double hung and the top actually opens as well. I only have sensors at the bottom. The windows (Anderson Silverline 3000 series) have little catches that you can turn outwards that effetively only let the top portion open about 4" so in the end i'm not too worried about somebody coming in that way.

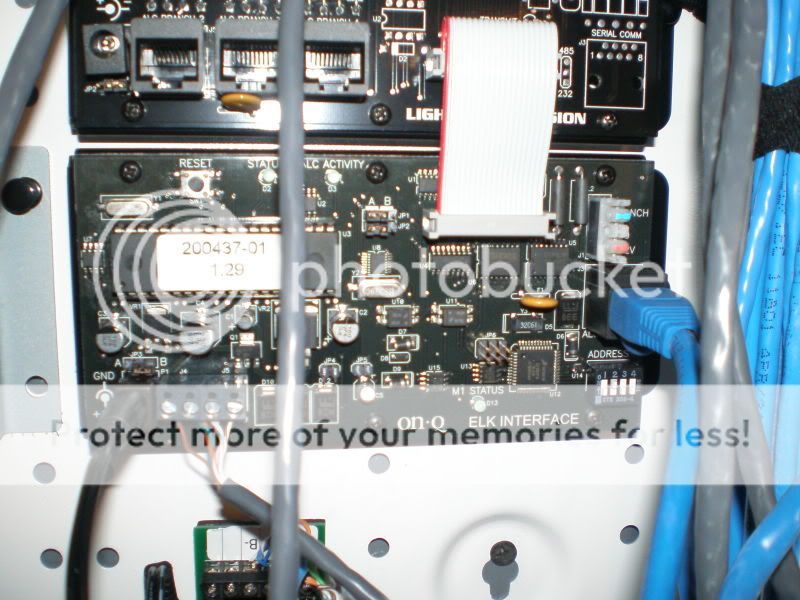
I had the thermostat locations wired with cat5 in addition to their standard wiring (cat5 to wiring room while the standard wiring goes to the HVAC zone controller at the furnace) and had keypads pre-wired. I didmn't realize that the ELK KP2 Keypads I plamned to use (because they look nice when mounted recessed) don't have a speaker. Remeber to run an extra cable to drive a ELK SP12F speaker which you can mount hidden behind the keypad after you pop it from the white bracket it comes with (this works great). I ended up running another cable to the keypads locations afterwards for this which wasn't very easy.

I had all the rooms on the ground floor pre-wired for whole house audio as well as the master bedroom and master bathroom on the 2nd floor. The ground floor ceilings are nearly impossible to get into once drywall is up so this was the only change to get wiring in there. For the 2nd floor i have attic access since it's easy to add speakers and wiring later, but i know i was going to have speakers in the bedroom and bathroom. A total iof 7 zones are pre-wired. The LV contractor also installed the speaker (Polk RC60i) in 4 of the zones (kitchen, family room, master bed and master bath). All the pre-wiring for the audio was done using 16/4 speaker wir plus cat5 from wiring room to the keypad location and then have the 16/4 continue to the speakers. This allows many different options.

One thing i woudl recommend is to have some extra loops of the cat5 and speaker wire at the keypad location. Some of the systems (like Nuvo and Russound) allow local source input. You may want to tie a local Ipod of whatever in at some point. Having to run the wiring a keypad location (typically in eye sight) woudl be ugle. With some extra cable in the wall you could make a LV oulet at lower height and run the cable in that way.

- LAN/TV/ETC.

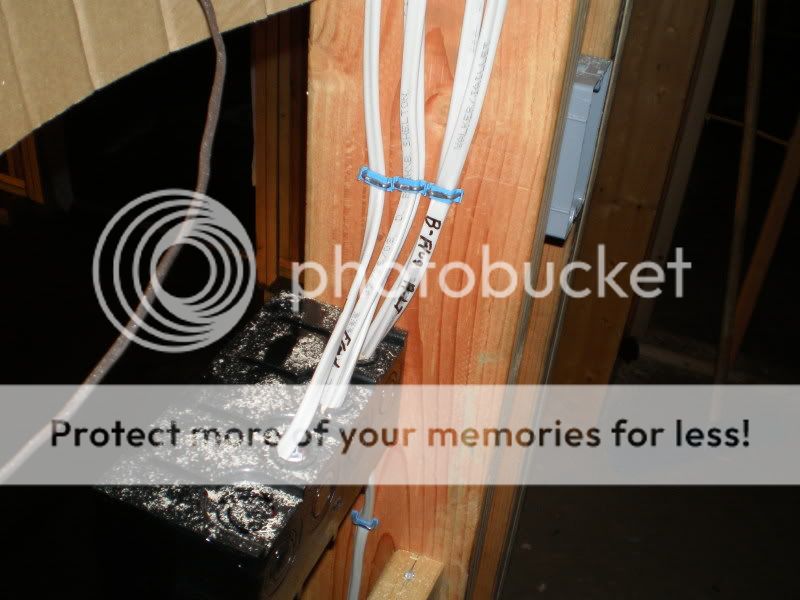
I didn't pre-wire for any cat5/6RG6/RG59 etc. Instead i had a 3/4 conduit with a 1 gang LV bracket (mudring) put at all locations where i thought i may want something at some point. I mainly did this for the ground floor and any locations on the exterior walls of the 2nd floor. The interior walls should be easy enough to get wiring into but the exterior is more difficult due to insulation.

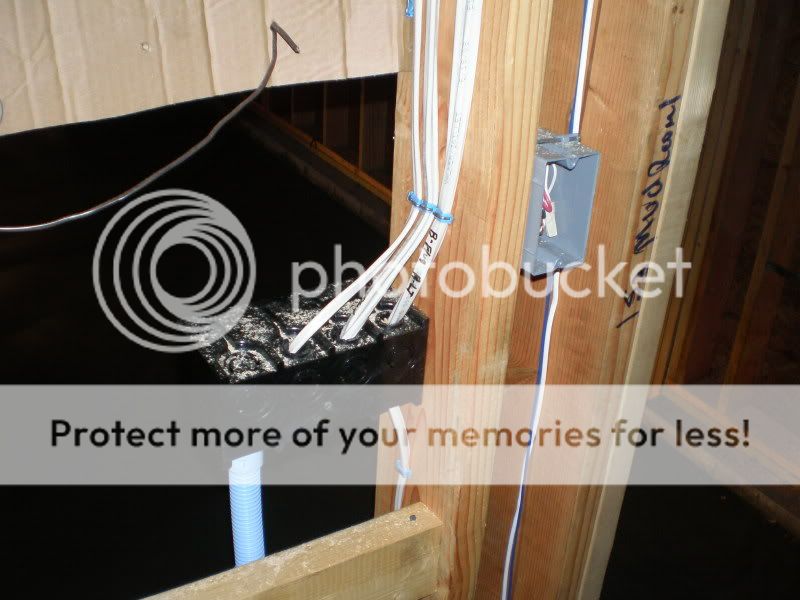
After some testing i concluded a 3/4" conduit will hold 2 RG6QS + 3 cat5e at the same time IF you pull them through together. I also tested how easy it was to pull through these conduits by creating 2 sharp 90 degree bends. This all worked fine. The conduits don't homerun to the wiring room but are just short lenghts up to the attic or down to the basement.

There are 2 2" conduits between the attic and the basement. If you pre-wire for cat5/6RG6 and all that that should be plenty for 'future stuff' but since i didn't do that I'm finding that these conduits are filling up fast. A 3rd or 4th would make me more comfortable. Depending on the size of your walls you may also try to get a bigger conduit (3" or 4" in).

For my main TV location I have a 2" pipe from the basement since i expected to maybe run component/DVI/HDMI or whatever there at some point.

2ndFloor-EastBedroom-EastWall-1.jpg


If you want to run conponent video (5 RG59's) then the 3/4 conduits are not a good solution. I wasn't planning this and knew i had the balun option (since you can get a lot of cat5/6 into a conduit) to do this if i ever wanted.

I didn't really start thinking about what i wanted where untill i moved into and was ready to run the wires...

- CABLING COLOR CODING / IDENTIFICATION

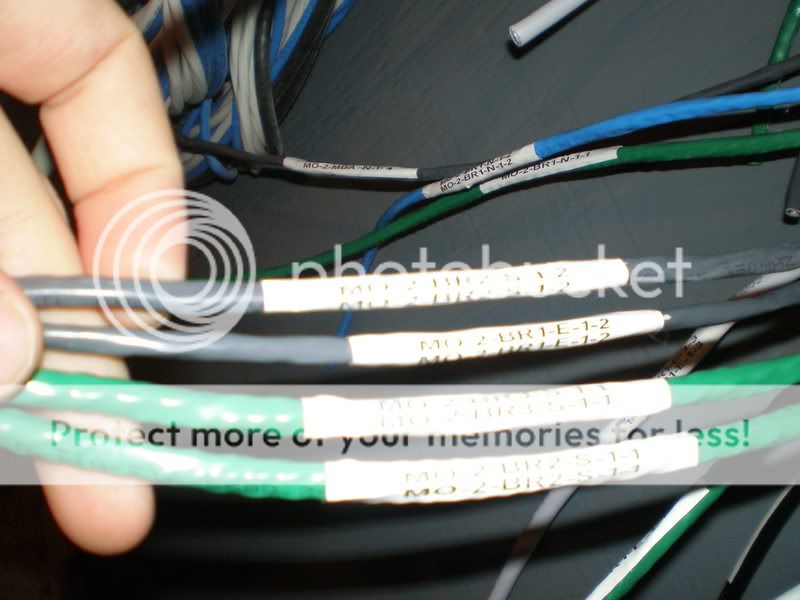
Since i didn't 'pre-wire' in the the classical sense i didn't put a whole lot of wire into the walls that i may not use. Currently i am only pulling cables to the locations where i want something and leaving the other conduits empty. Since it's not so easy to add cables to a 3/4" conduit when i do make a run i put in some spares as well. In general this means i don't nearly need as much cables.

I bought 2 boxes of RG6QS (white and black), 2 boxes of cat5 (blue and gray) and 1 box of cat6 (green) from Monoprice.com . I got this combo since i thought this woudl probably be the max i woudl be running to any location so i could pull all the cables for location at the same time. This way you just pull out of the boxes as you go and you don't have to measure and cut to double up. Since all are different colors i also don't have to ID the cables initially except for the bundle as a whole at the wiring room end. (i.e. for the master bedroom tv location i put some ductape around the bundle at the wiring room end and labelled it Master bedroom).

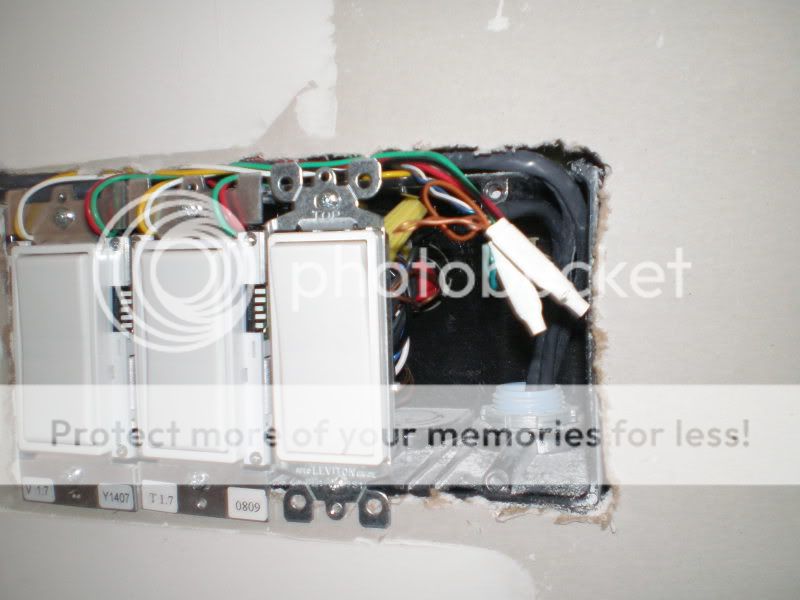
My plan is to run some RG6QS but mostly cat5/6 to most locations. At those locations i terminate this on Leviton Quickport keystones. At the wiring room end I got a 48 port Leviton Quickport 19" rack backplane so i can put keystones in there as needed. This way i can keep all the cables going to the same place together next to each other rather than have the coax and cat5/6 for the same room go to different places. Some have warned that combining coax and cat5 on a patch panel makes things messy since they're different cable and coax doesnt bend as well, etc. So far i havent' had this problem, but i haven't gotten to the tidying up part. If this does turn out to be a problem then i just take all the coax keystones and put them together and take all the cat5/6 keystones and put them together. Using the quickport backplane with keystones is not the cheapest solution, but it's giving me a lot of flexibility which i like.

I didn't wire for any IR or serial or whatever since i plan to use the already terminated cat5/6's for this. You can put a RJ45 plug on the IR /serial cablign on each end and send the stuff over the cat5. Repatching would be very easy.

The strategy is that everything that ends up as a jack in a wall somewhere is also terminated on the Quickport back plane in the wiring room so i can activate these ports quickly by simply patching network/IR/serial/RF whatever into them. Some cables are left unterminated at the LV rings (so i don't have to purchase some many keystones), the same cables are also left unterminated in the wiring room. All are labelled to a convention so it's easy to know where the spares are going. For the keystones I'm using Leviton Quickport Cat5e and cat6 keystones, for the coax I am using Female connector. Most F-Type/RCA keystone are actually female/female and require you to put a male RCA/F-type plug on the cable in the wall first and then connect it to the keystone. The Leviton 40782 Series i used puts a female keystone right on the cable. Thats one less connection that introduces noise or possible failure. Although the documentation says you need to use Levitons own Master Compression Toolyou can compress these with the Paladin Sealtite Pro just fine (I actually got their 4910 Kit)..

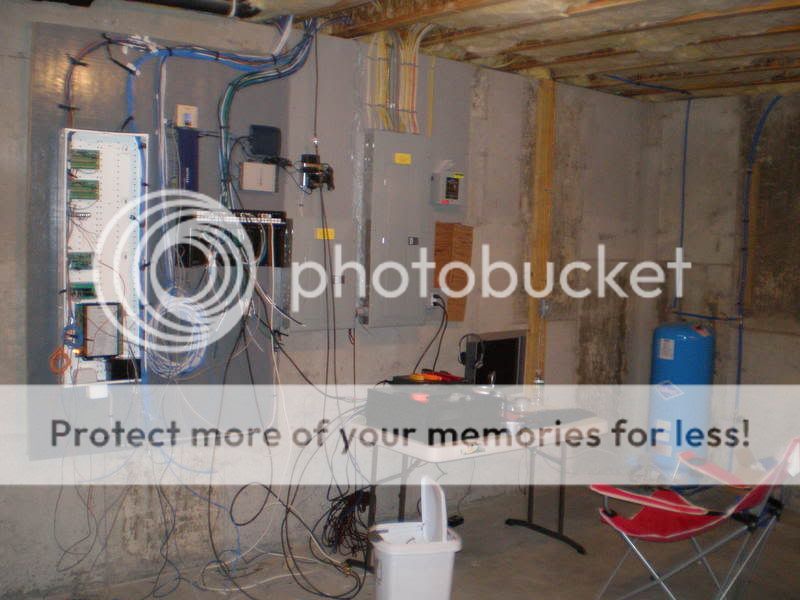
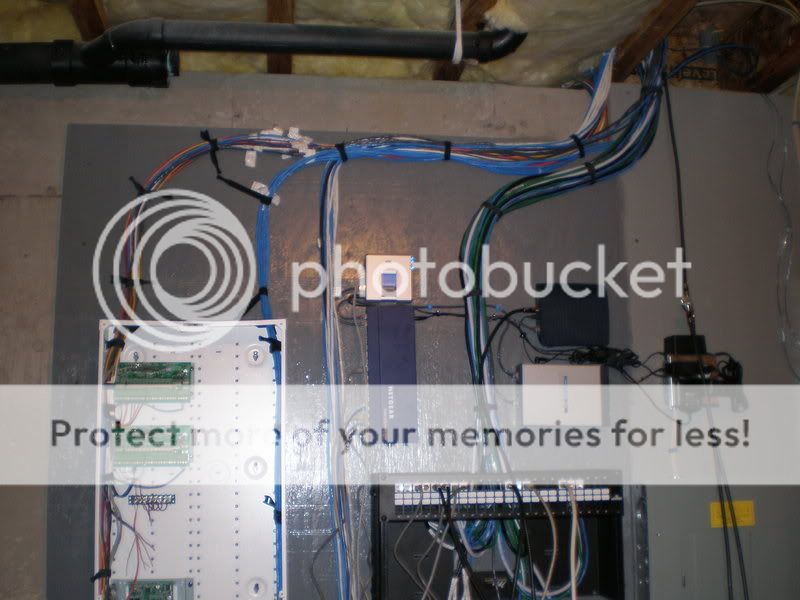
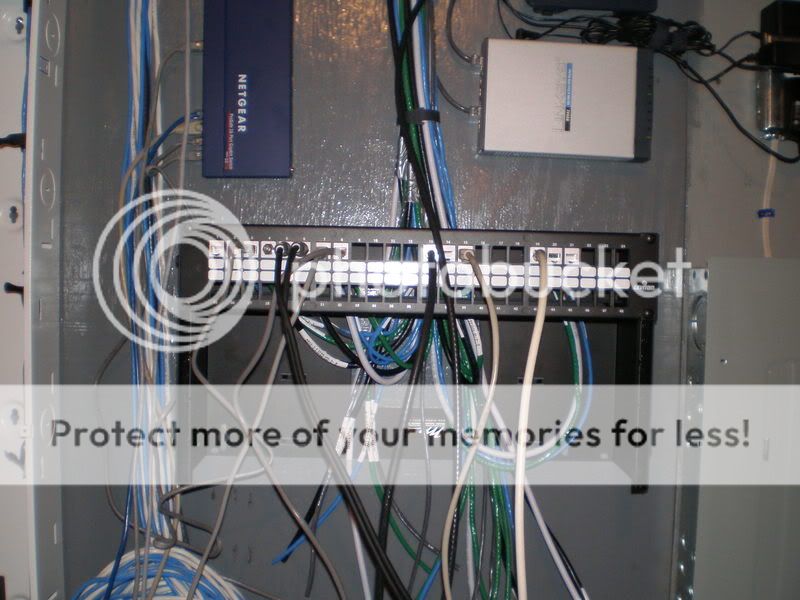
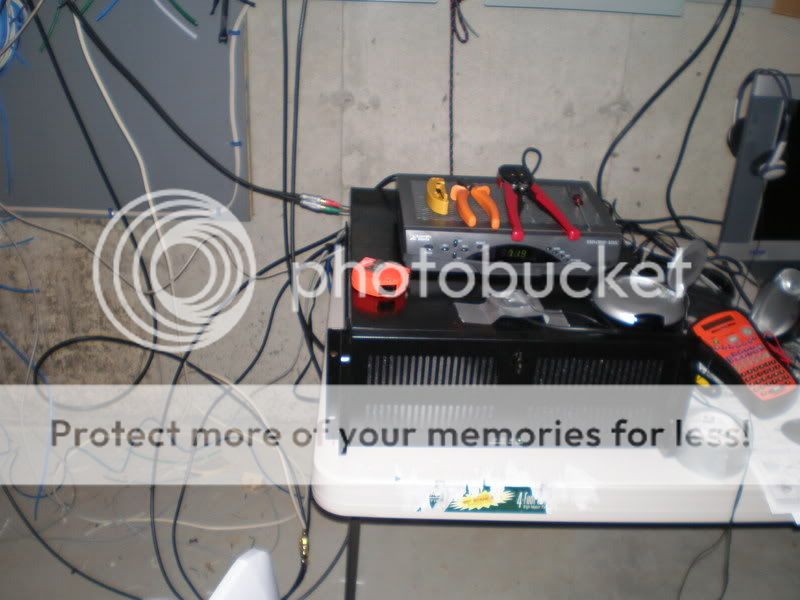
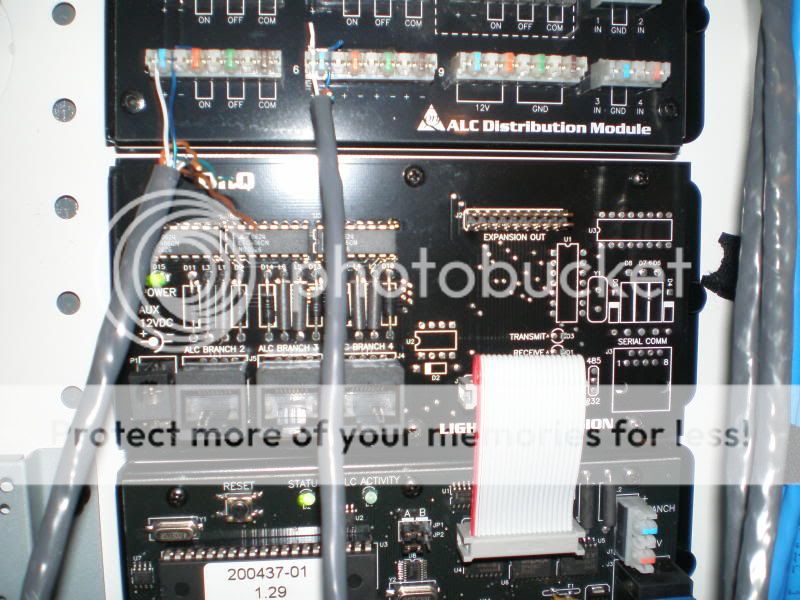
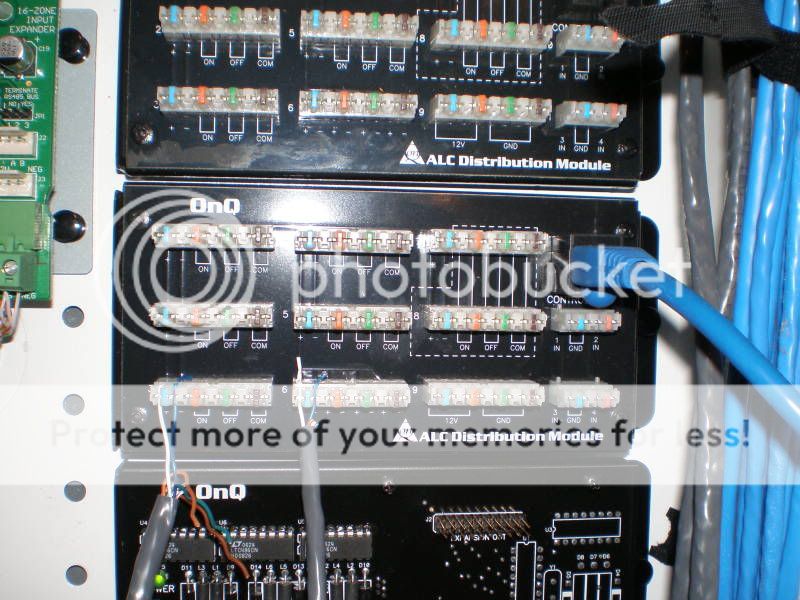
Here is some pics of the wiring room/area in it's current (12 Feb. 2009) state:

Overview....quite a mess:
P2120014.jpg


Cable Modem, Router, Switch, VOIP adepter all mounted and organized:
P2120018.jpg


The Leviton Quickport 48 port backplane mounted in a Middle Atlantic Hinged Panel Mount (HPM6):
P2120019.jpg


Unterminated media cables (those going to Media Outlets) loose but labelled at the Backplane (I'll bundle them together at some point):
P2120021.jpg


P2120022.jpg


The Server (Windows Home Server running SageTV only at the moment) sitting, waiting for a proper rack. Comcast STB with USB-UIRT on top.
P2120024.jpg
 
ALC install pictures:

ok..just quick post by request on the ALC install...will do a proper write-up at a later time...

ALC modules in the SWP:

ALC modules are not a straight fit into a Leviton cabinet, note how the holes don't line up. The pushpin on the right will fit.
P3150020-1.jpg


My solution, drill some extra holes:
P3150021-1.jpg


Panel Overview:
P3150013.jpg


ALC Modules Grouped:
P3150014.jpg


ALC<> ELK Interface
P3150019.jpg


ALC 3 Brach Expansion Module (via ribbon cable to the controller)
P3150017.jpg


ALC Distro modules, since they have space on the modules for the cable to run i put all these modules close together to save panel space.
P3150018.jpg


Pre-wire, HV boxes with variable LV section and conduit connections:
1stFloor-Foyer-SouthWall.jpg


2ndFloor-MasterBath-NorthEastWallAt.jpg


PA150014.jpg


PA150015.jpg


ALC switch install:

4 gang box for 3 switches, LV section on the right with conduit. HV/LV divider missing, to be added. If needed one could make the 4th gang HV as well for a ALC scenre switch, then you woudl just put the 600v cat5e sheathing over the cat5 as it comes out of the conduit and make all the LV conenction outside the box. If the conduit section stays LV then all the connection can go in that. As shown in this picture.

If you start with all toggle switch and you replace some with ALC but not all you may have a hard time finding faceplate with the right toggle/decora combination. Repalce a non ALC toggle with a non ALC decora is pretty fast,e asy and cheap. The most right switch in this case is not an ALC switch. Didn't see the need to spend the money for making the outside floodlights (which we never use) ALC. Maybe at some point i will for security reasons....
P3150011.jpg


P3150012.jpg
 
Looking good there.

I can only remark that it is curious that no company has come out with a series of wall boxes that elegantly merges low and high voltage wiring. Nevertheless, your work on the wall boxes looks goods.

I think you will want control of your outside flood lights for security purposes. Imagine a rule that says when the alarm goes off, turn on the outside floods, or how about an exterior motion sensor in the back of the house that triggers the floods if someone is walking in your back yard/patio/ etc.

Finally your basement wiring area looks pretty good, but I suspect you will want to add a network cabinet or "relay rack" when all is said and done.

Overall, it looks like nice construction with thoughtful wiring--more than what can be said of my recent construction experience.
 
Hehe..you're "mess" of a wiring area looks better than my area that was my best attempt at organization.

What did you use for labeling, Mavric? That's about the only thing keeping me from feeling up to the task of terminating. Right now I just have stuff written on the cable jacket via sharpie.

I'm looking for the CHEAP labeling solution.

Get a wire labeler. Rhino 3000....a recent cocoontech poll said it was the standout in popularity. http://www.cocoontech.com/forums/index.php...&hl=labeler

as a just in case....you might also use the sharpie and just put "a number" on it that maps to an excel spreadsheet with the details of that wire's purpose and routing and connections. The Rhino would be what you rely on during install, but if the label falls off, easy enough to lookup the "number" on the spreadsheet.
 
Sorry, I should have emphasized it more....I'm looking for the CHEAP solution. ;)

I've had this discussion before in another thread, where indeed the top suggested labeler was the Rhino. But I just can't swing that purchase. So when I see someone who has labeled something, I ask in case they came up with some somewhat more ghetto-cheap way of doing it. Right now I'm just looking for an improvement on sharpie-on-jacket, just because the jacket is a poor writing surface, and the different colors make it difficult to see sometimes.

The next step up from that I think would be PC-printed labels "laminated" with some scotch tape. I just haven't tried that yet.
 
4 gang box for 3 switches, LV section on the right with conduit. HV/LV divider missing, to be added. If needed one could make the 4th gang HV as well for a ALC scenre switch, then you woudl just put the 600v cat5e sheathing over the cat5 as it comes out of the conduit and make all the LV conenction outside the box. If the conduit section stays LV then all the connection can go in that. As shown in this picture.

I was wondering about that methodology - how long is the sheathing they provide?
 
Back
Top