pete_c
Guru
Well giving this a try...never did this before...posting here using Chrome on Ubuntu Laptop.
This is one of six dining room table chairs. It was damaged by me putting my foot through it while standing on the chair. Standing on a cane chair is not recommended
My 6 kitchen oak with can kitchen chairs appear to be better made to me.
Watched this video and other videos posted on You Tube.
Originally gave another chair to a wood guy and it was about 3-4 weeks wait and around $120 to do before Covid. Probably much higher these days. Not sure if it is worth it....
Watching videos to do it...currently soaking cane...read to soak the cane 1-2 hours...so using the laundry room tub...total soak time was 60 minutes.
Yesterday removed old cane. I did not have a steam machine so drilled a few holes in the old spine and sprayed the spline with pure vinegar. Worked after 10 minutes or so and I was able to remove the spline.
The tools were purchased on Amazon.
Sanding while soaking this morning. Easy but time consuming.
Hardware Purchased
1 - Caning Chisel Length of blade: 4" Width of blade: 3/16" Overall length: 8" $19.95
2 - Hurricane 4 Piece Wood Chisel Set for Woodworking, CR-V Steel Beveled Edge Blade, Durable PVC High Impact Handle Wood Chisel $14.99
3 - Chair Caning / Cane Caned Seat Replacement Repair Kit Breuer 18" x 18" $36.96
4 - Elmers white glue
5 - dremel tool - not required
6 - vinegar in a spray bottle
7 - sand paper
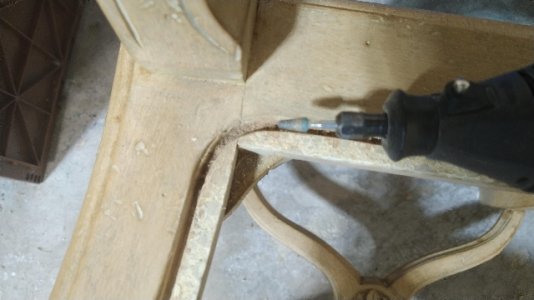
I used fine sandpaper to sand around the edges and in the grove for the spline. Dremel tool for the corners.
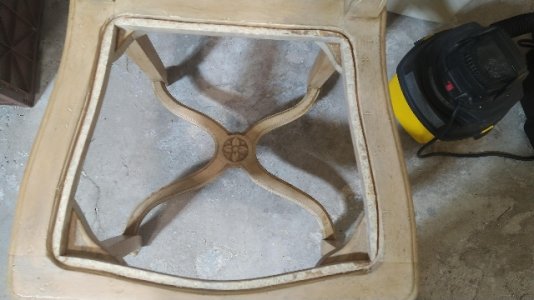
Here is a picture of chair with cane removed. Took about 30 minutes to remove the old spine.
 t s
t s
Next steps while cane is wet is to insert a wooden wedge on front, back and sides. Check to make sure your lines run parallel to the edges. This was a bit difficult as here the edges are rounded a bit. Then take wooden wedge #5 (included in kit) and push cane in to grove on the four sides. Wait to do the corners. I cut excess cane with scissors and pulled lines of cane out to edge of groove one side at a time. Take your time. You can spray water on the cane if it starts to dry. This is much more difficult for me than tinkering with a router or Home Assistant or Homeseer or doing electric, plumbing or automotive stuff.
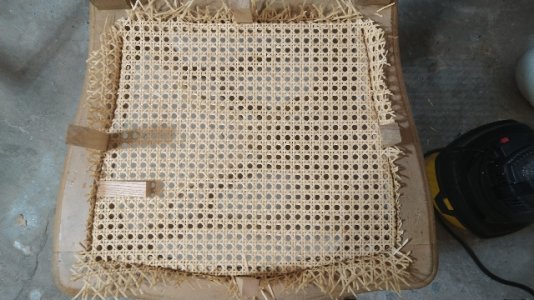
Then you take a sharp chisel angled and facing out from the middle cut the excess cane off. Here is one side done. Corners using a tiny chisel and will be done after the sides.
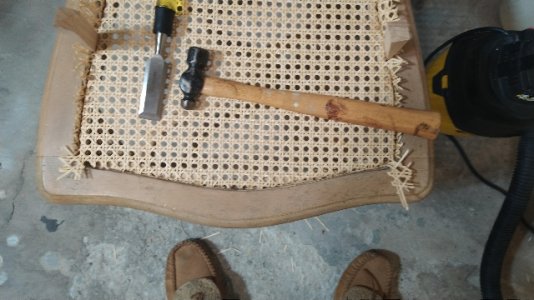
Used small chisel for corners...ready to install spline. You just put a tiny bid of Elmers white glue in the grove and tap in the spline. Cut the first end of the spline at an angle to match the end of the spline. Spline installation starts in the back middle section.
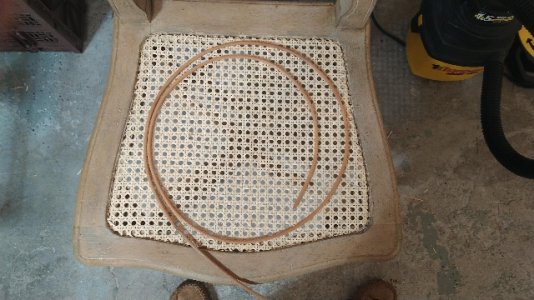
The wet spline was very soft. Tapped it in with a hammer and a 4 " piece of hardwood.
Finished. Not bad for my first time doing this. Still tapping the spline down.
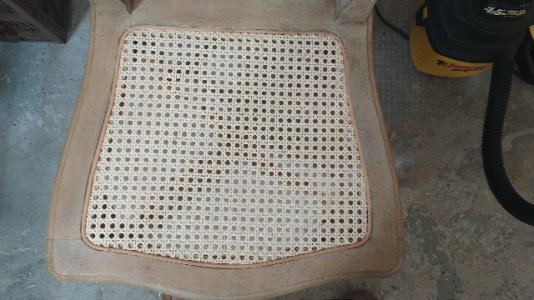
This is one of six dining room table chairs. It was damaged by me putting my foot through it while standing on the chair. Standing on a cane chair is not recommended
My 6 kitchen oak with can kitchen chairs appear to be better made to me.
Watched this video and other videos posted on You Tube.
Originally gave another chair to a wood guy and it was about 3-4 weeks wait and around $120 to do before Covid. Probably much higher these days. Not sure if it is worth it....
Watching videos to do it...currently soaking cane...read to soak the cane 1-2 hours...so using the laundry room tub...total soak time was 60 minutes.
Yesterday removed old cane. I did not have a steam machine so drilled a few holes in the old spine and sprayed the spline with pure vinegar. Worked after 10 minutes or so and I was able to remove the spline.
The tools were purchased on Amazon.
Sanding while soaking this morning. Easy but time consuming.
Hardware Purchased
1 - Caning Chisel Length of blade: 4" Width of blade: 3/16" Overall length: 8" $19.95
2 - Hurricane 4 Piece Wood Chisel Set for Woodworking, CR-V Steel Beveled Edge Blade, Durable PVC High Impact Handle Wood Chisel $14.99
3 - Chair Caning / Cane Caned Seat Replacement Repair Kit Breuer 18" x 18" $36.96
4 - Elmers white glue
5 - dremel tool - not required
6 - vinegar in a spray bottle
7 - sand paper
I used fine sandpaper to sand around the edges and in the grove for the spline. Dremel tool for the corners.
Here is a picture of chair with cane removed. Took about 30 minutes to remove the old spine.

 t s
t sNext steps while cane is wet is to insert a wooden wedge on front, back and sides. Check to make sure your lines run parallel to the edges. This was a bit difficult as here the edges are rounded a bit. Then take wooden wedge #5 (included in kit) and push cane in to grove on the four sides. Wait to do the corners. I cut excess cane with scissors and pulled lines of cane out to edge of groove one side at a time. Take your time. You can spray water on the cane if it starts to dry. This is much more difficult for me than tinkering with a router or Home Assistant or Homeseer or doing electric, plumbing or automotive stuff.

Then you take a sharp chisel angled and facing out from the middle cut the excess cane off. Here is one side done. Corners using a tiny chisel and will be done after the sides.

Used small chisel for corners...ready to install spline. You just put a tiny bid of Elmers white glue in the grove and tap in the spline. Cut the first end of the spline at an angle to match the end of the spline. Spline installation starts in the back middle section.

The wet spline was very soft. Tapped it in with a hammer and a 4 " piece of hardwood.
Finished. Not bad for my first time doing this. Still tapping the spline down.

Last edited:
