EOLR Wiring details, water sensor

Neurorad

Senior Member
I'm wiring GRI 2600 water sensors, and I'd like to use EOLRs for monitoring.

I've never used resistors for an alarm. What are some good for ways to physically make the connections?

(It's my understanding that the resistor should be wired in parallel to the sensor. Correct me if I'm wrong.)

I bought some 2600s with the flying leads/pigtails. Kitchen remodel. 22/4 run. Don't have the alarm yet (but will be M1).

Any pics would be great, too. Can't find any with Google.

These are in inconspicuous places (behind fridge and dishwasher, under sink, behind dishwasher). I'm tempted to use a j-box or project box an inch from the sensor.
 
Stupid question, but the 2600 is usually mounted to a vertical surface, with the contacts touching the floor?
 
Here I utilize similiar to the HAI panel.  I don't really need any sensors except for the basement sump pump area (also adjacent to the hot water heater).
 
That said I wired these many years ago and believe I have the EOL wired in series, soldered and with heat shrink tubing on the wire.
 
I have redone my drainage such that my sump pump well rarely gets water in it.  That said its in place to check on the sump pump function and backup sump pump should primary fail.  I did have a life time warranteed pump fail on me one (caused me some grief and in turn I caused some grief at the big box hardware store that sold me the piece of crap).
 
I have tested it way long time ago and just checked on the analog reading and it is 148
 
The GRI 2600 is a normally closed sensor, so I would install the resistor in series.  (The GRI 2500 is NO.)
 
Any suggestions on how to make the connection, of a resistor and a 22 AWG solid conductor?
 
Its been so long that I installed it I can't tell what it is other than the GRI label on it and there is 4 wires going to it.
 
I did purchase it for the HAI panel from Worthington many many years ago.
 
It is mounted on a small piece of wood which is glued to a brick sitting on the cement floor between the water heater and the storm water well and adjacent to the ejector pump / well such that sump pump/ejector pump or water heater failure will trigger it.
 
Sort of particular about the rest of the copper plumbing in the home and its terminations as I also utilize a whole house pump to keep the pressure above 30 lbs but less than 60 Ibs; that said I should really not have any problems with the other water connections.  I do not utilize any plastic between the copper and water spigots (anywhere - pretty much). 
 
About two years ago wife wasn't happy with the originally contractor installed kitchen spigot et al; so replaced it.  While doing that redid all of the plumbing underneath the sink as it was not done according to my liking. Figured the spigot itself was some $300 or more such that it justified my under the sink endeavors.
 
If it leaks; which I hope it doesn't I will only have myself to blame anyways.
 
I was though paranoid a bit about the laundry room / floor (its wood) such that I did utilize a water proof underlayment, sealed it then tiled and water proofed that.  Never had a problem though relating to any water leaks between the washing machine and the in wall water source / drain.  I did also redo the plumbing from the dishwasher to the supply as I was not thrilled with the original installation.
 
That said I am using 22/4 and have both 12VDC and an EOL resistor in series soldered on it.
 
I just checked the leads and what zone its going to and there are 4 wires and I noticed I cut the 22/4; installed the EOL and put heat shrink tubing on the 22/4. 
 
I can take pictures of the wiring / shrink tubing stuff.
 
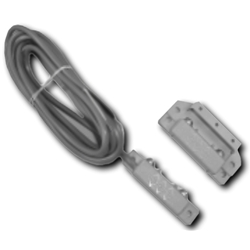
The 2600 is used to detect the presence of water and to provide a relay signal for controlling
external devices. The switch operates on 12 Volts DC and functions as a Normally Closed Sensor,
for a Normally Closed Loop system. The Red and Black wires are for powering the switch while the
White and Green wires are the relay control wires.
For installation on an alarm panel, the Red wire is connected to the auxiliary 12 volt supply and the
Black wire is connected to negative. The Green and White wires can then be connected to any preselected
Closed Loop terminal. A resistor can be connected in series with either the Green or White
wire for those panels that require end-of-line resistance.
For applications other than alarm panels, see switch specifications or contact factory.
After installation these units should be tested with water and inspected annually. If there is any
corrosion or damage the sensor should be replaced.
 
Thanks, Pete.  I think twisted, soldered, and heat shrinked is the way to go, but if there was a crimp connector that someone could recommend with confidence, I would do that.
 
I could swear there used to be more installation info on the GRI website.  Maybe they've pared down the info, to push support on distributors.
 
What's this GRI 2600K DC Sensor (W/1-2600T-PHS Sensor)?
 
2245.jpg
 
Yup; here I have not used any crimp connections for my EOL resistors.  It was a real pita on the combo optex cams to solder and  heat shrink the leads while on a ladder; but easy and fast. (you just have to go slow and be carefull because you still need to utilize two hands to do this while standing on a ladder).  Even one soldered on EOL gave me problems with one door frame expanding and pulling on the leads of the door switch until they broke a couple of years ago.  Crimping the wire may be a problem in the future. (but this is my opinion though).
 
Here is the manual for above mentioned GRI water sensor.  I do not have any issues getting to the installation manuals on the GRI site.  That said I am starting to have issues with viewing many web sites even using IE / chrome or Firefox.
 
http://www.grisk.com/specialty/pdf/2600%20Series.pdf
 
Here always utilize the little portable mini torch like soldering device (indoors and outdoors); easier sometimes than plugging in a soldering iron. 
 
IE: other than my basement workbench (actually now use an smd work station of sorts)  the regular soldering iron use is very low on the WAF these days.  I worked on the MM wiring in the master bedroom and accidently burned the rug a touch. (but it was not easy to see with furniture on it).
 
Historically have purchased my heatshrink tubing from here:
 
http://www.allelectronics.com/make-a-store/category/265/Heat-Shrink-Tubing/1.html
 
You can purchase heat shrink tubing at the big box hardware stores or radio shack; but its really expensive there.
 
Unfortunately, that's the only 'manual' for the 2600 series.  I think there was a longer 4-5 page manual/spec sheet/install guide, in the past.
 
I have some heat shrink butt splices, but not sure how well they'd work without the proper crimping compression tool for them.
 
Given my experience with soldering (haven't done it in 30 years), I think my soldered connections wouldn't be as good as a mechanical butt splice.
 
Maybe I'll give soldering a shot, and see how it goes.  I'll be sure to avoid mechanical stress on the connection, using strain relief of some sort (any ideas or tips on strain relief?).
 
I've never used B-connectors.  Would it depend on the AWG of the resistor?
 
What sort of crimper would I use with beanies?  I know there are usually a variety of options, budget-wise.  Can someone suggest a tool, or do most people use a pliers?
 
Actually, while all the above function, the best way is a crimp tool, either the cheapie frame types or what is always marketed/labelled as a "wiring tool". I use a T+B 112M, but Klein, Channelock, Dewalt, GB, Ideal, and almost all the big players make some variation of them.
 
The key is to not flatten the chicklet but to oval crimp it. Overcrimping or flattening makes the connection strictly a physical one rather than having the teeth inside the chicklet bite into the wire (flattening peens them over). You also don't want to use a pair of dikes to put a small "whoop" into the connector to hold it on.
 
If you do it properly, compounded with a strip/twist method, you're not going to have problems with the splice.
 
Back
Top