You are using an out of date browser. It may not display this or other websites correctly.
You should upgrade or use an alternative browser.
You should upgrade or use an alternative browser.

IMG 2434
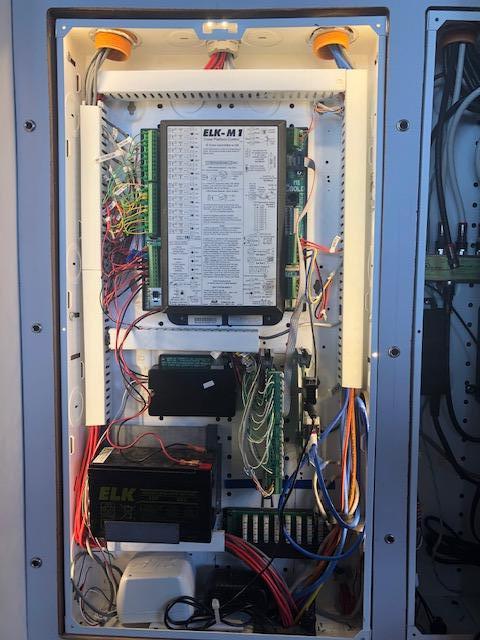
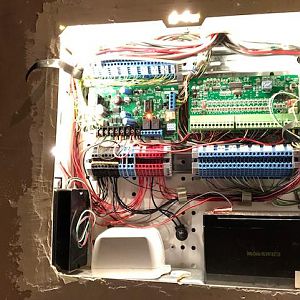
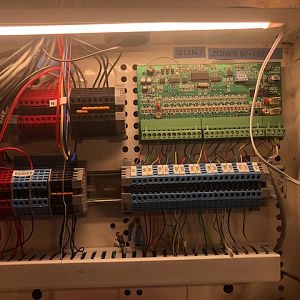
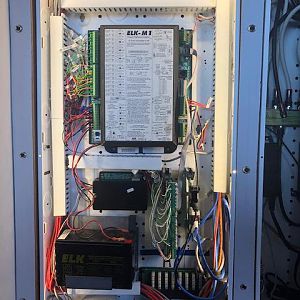
These are pictures of my DIY installation of my Elk Security and home automation system. This was a complicated installation project in my existing home with many difficulties in installing the wiring. The home is very large and required many zones for the vulnerable windows (16), doors(13) , motion sensors (29), glass breaks (11), smokes(10), heat alarms(5), temperature sensors(7), gas(2), CO(2) and water(3). I hardwired everything that I could and used Elk wireless sensors for security critical windows where I couldn’t wire. I used Interlogix sensors for interior doors, water alarms and other home automation devoted purposes. The system currently has 2 M1DBH data base hubs, 4 input expanders, 2 output expanders, 4 keypads (1 KPB and 3 KP2s), 1 arming station, 2 P212S for additional power, 1 M1XRFEG, 1 M1XRFTWM, 6 speakers, a siren, strobe lights and an M1XEP. I anticipate adding a serial expander and input expander for the greenhouse in the future. The main panel is installed in an automation closet off the living room that also contains two other Elk panels which are pictured below. The panels are lighted with LED lighting. The main panel houses the M1, surge suppressor, 1 output expander, the M1XEP, and the battery. It is also a pass through for LAN wiring from the lower floor of the house. Panel 2 contains an output expander and the speaker wiring. I used terminal blocks which are labeled with the zone number to set up the wiring in the expansion panels and this made it easy to establish the serial/parallel wiring for the speakers (measured at 6.6 ohms) as well as ease in terminating the zones. Panel 3 contains a P212S power supply, surge suppressor, battery, the 2 M1DBH data base hubs which currently control strobes and speakers enabling notifications to specific areas in the house. Panel 4 is in another closet in the house where wiring from the lower floor passes through a wiring chase and goes on to the attic. The panel contains another P212S, surge suppressor, battery, and two output expanders which are stacked using standoffs. The fifth photo is another panel in the main automation closet which contains the wiring for my Panasonic PBX through Channel Vision KSU distribution panel, the house cable modem, an Obihai for a second internet phone line, the ISY994i pro which connects with the M1 and a Zotac PC running a touch panel (not shown) which shows, among other things, M1 ToGo. The system works flawlessly and I had lots of fun learning about it and installing it. Many thanks to Brad Weeks who helped me out at a couple of critical points and to the Forum members on Cocoontech, UDI, and CQC.