Central Wiring Panel / Closet location ideas (creativity)

Then PVC conduit will work and is DIY friendly. I'd prefer EMT in a space where the conduit is subject to physical damage (or the HO is likely to hang items on it).

I'd probably pop the wiring through the outside to the unfinished inside, then into a LB in proximity to where the wiring enters, then straight shot around to where it's going into the house...couple of sweeps for inside corner(s) and then another LB where I'm going through the sill into the crawlspace, sleeve through the sill and then move to something like romex staples or similar.

If you're going to be approaching the maximum number of sweeps possible, then a slow bend/offset to change from a 90* shot to something less.
 
Enclosure installed last night in the closet... I'll post some pics in the coming days after the termite fumigation is done : )
 
Update:I have completely phase 1 of my installation.Leviton 420 Enclosure installed in Entry Closet

2RG & 2CAT5e ran to each outlet in everyone room (some rooms have 2-3 outlets)
Uverse installed their i3812V iNID device within the enclosure

Questions Now:
What outlet covers does everyone recommend for patching cat5e & rg6 for a clean look?

What Leviton components should I purchase for the enclosure to distribute the network to cat5e and video through RG6?

Any good Leviton brackets to mount equipment in the Leviton enclosure?

Any other fun toys to install within the enclosure??


Thanks
 

Attachments

  • IMG_1339.JPG
    IMG_1339.JPG
    66.5 KB · Views: 62
Usually, the distributed item is dependent on what manufacturer's enclosure you end up with, since the mounting patterns are different for On-Q vs. Channelvision, etc. For the most part, the units are equivalent, the only factor I've dealt with is how many outlets/runs you want to terminate or how many modules you end up installing.

Plates and keystones are somewhat universal, IMHO, a plate is a plate is a plate. I use ICC a lot.

There's plenty of mounts and brackets that can be adapted to 3rd party equipment.

I might not have had them put their INID right in the enclosure, I probably would've preferred having a traditional dmarc, then run to the inside and then install their more traditional gateway, but what gets put in is typically either market driven or install driven.
 
Thanks for the feedback...

I can always remove the iNid and install it outside where the old Bell demarc was installed if space becomes an issue.

Any good places online to look for ICC Plates?

Here is what I have going to each plate (7 plate locations with the 4 wires below)
1 Coax getting Uverse Video feed from iNid
1 Coax for future distribution of audio or video
1 Cat5e for network
1 Cat5e for future distribution

Based on my setup any recommended products for distribution of the services? I have a Leviton enclosure so probably ideal for Leviton products that can bolt right up unless there is a better alternative.
 
I can't really speak for what is available to you as a HO, I've got full trade access to every manufacturer and line out there.

Usually, unless you get adapter plates or you go the modify method to go from one manufacturer's design to another, like the ones that have pins only or the pin/slot units, like Leviton or OpenHouse, you stay with the manufacturer's products.

I have a cheapie network switch inside my enclosure besides all my cable and distribution, along with intercom and door phone unit, but that's just what I did in my case, I've got 3 28" enclosures mounted side by side and piped together in a utility room.
 
DEL, care to share any pics of your setup? I bet it's 'tip top'. Maybe a new thread.

If I missed it, sorry. I will search later.
 
I can't say I'm 100% proud of my install. It was my first M1 and learning experience before I put it all together and saw how an Elk can and components basically go together like Legos.

. I came from the Honeywell/Ademco world and originally the house was wired with one of those with about 4-5 cans and 3 power supply cans. A full 4X4' sheet of plywood worth. I was stuck with the cable lengths I had to work with and ended up with more splices than I would've prefered.....I didn't have a place to coil up my slack in the joists.
 
Del, do you have any photos of a "lego" install? I am having trouble visualizing this.

In for this as well.

DEL, I also saw [I think] in another thread where you stated that you visited the Elk facility and saw how they designed for an Elk install to be done, fitting a lot of gear into a can. Pictures of this, or maybe some of your other work may be invaluable to those doing retro-fit work and/or having to work with smaller cans.
 
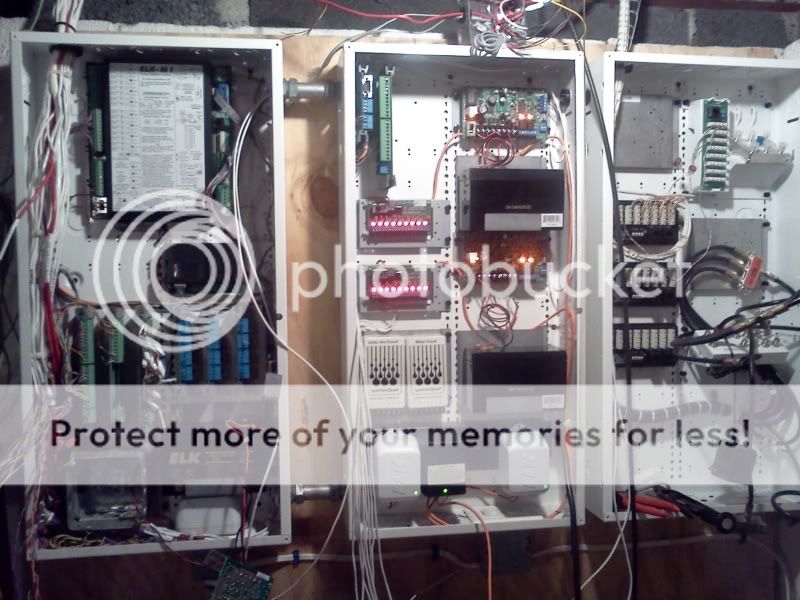
You need to use an Elk can and SWG's, not a universal can/mounting plates. There's some variables in where you can put the panel, but I've found it to work best up top/center and then start adding modules in tiers beneath it, either as full size boards or the smaller 2/3 boards (XSP's, XEP's, DBHR's, etc.) I don't use DBH's, they serve little purpose if you understand how to wire the bus, separate power out, and if you use the input/outputs on the KP's, it's more work than what you gain. I try to run at least 8 conductors to a KP, then tie the bus through in the panel.

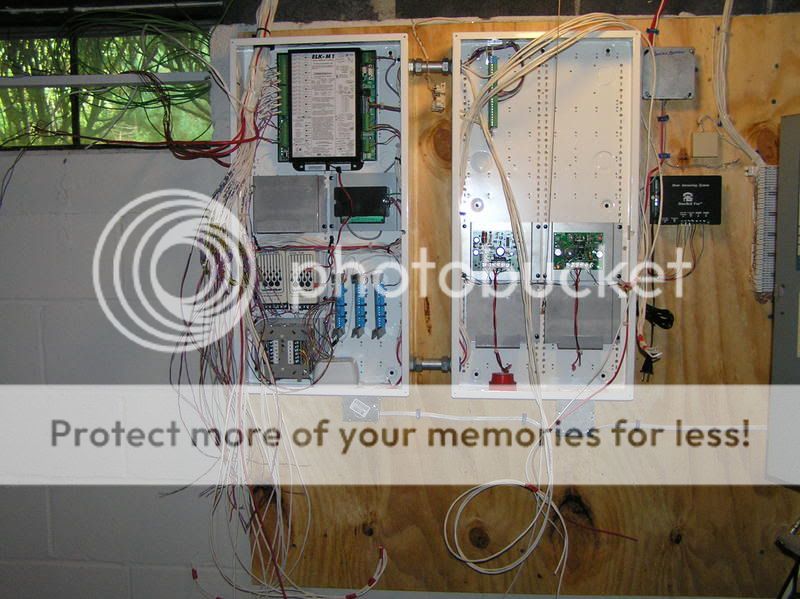
In this case, this was my house after ripping apart a large Vista installation and rushing putting it back together. Not extremely proud of it or the cable management, it's what I had to work with as well as get the system back up and running prior to going on a trip. This is with it about 1/4 of the way through the process, temporary power runs, few cables landed, etc, but it gives a basic idea for what units fit in where using SWG's. Still didn't have the fire modules wired up, but there's 80 zones worth inside there. and before more hardware inside the second can. I've got another 2 14" cans laid out elsewhere for junctions and remote hardware where it didn't make sense to pull back because of how the house is built and finished. There's also 3 more power supplies elsewhere in the house for strikes, etc.

Also, as they say, the shoemaker's children....

Also gives a look at what happens when you start terminating your own structured devices, cable lace them, then the apprentice telecom guy comes in and rips it all apart while you're working...they got their services working and ran away.

Just after getting the old stuff pulled down, then new cans up, before unboxing new parts. I was going to put all my zones, relays, etc in the second can, but didn't have a large enough chase between them, not to mention the disaster of crossing the panel.
P1010211.jpg


About 1/4 of the conversion started.


IMG_20101215_153801.jpg


This is how I normally like to work, this is a residence:
CopyofAUT_1555.jpg

CopyofAUT_1551.jpg
 
Thanks for sharing, DEL.

What do you call those blue cable channels?

What device do you use to release terminal block spring clips? Just a small screwdriver?
 
Are you referring to the Phoenix connectors? They have screws on some, others are spring tensioned. Othewise, all that's there is normal ty-raps and sticky backs.

I can't remember who made the cable management/troughs, but I'd probably say Siemon or Krone. It was provided by the customer and within their spec. The HO was a NIS/data center designer, and the basement had a raised floor throughout (also the location of their home theater/cinema).
 
Back
Top