pete_c
Guru
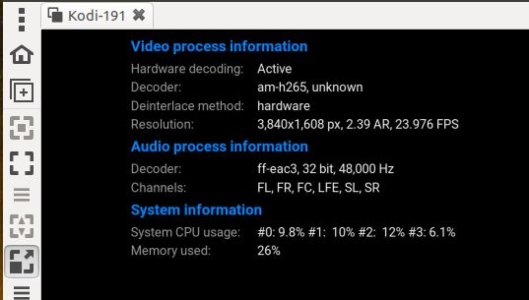
Here have been running 3 Kodi boxes with little mini S912 TV Boxes using CoreElec custom OS. I have had no issues here relating to playback / streaming of 4K files.
The boxes are running Kodi 18.X and have not been able to upgrade to Kodi 20.X due to S912 (octocore) hardware limitations.
These boxes are my STBs whick stream live video from HDHomerun boxes (and record if I want), NAS box, Netflix, AOD (et al with subscriptions).
Note these sold TV Boxes come with Android running on the eMMC. You boot up these boxes with a new Kodi OS called CoreElec.
CoreELEC is a ‘Just enough OS’ Linux distribution based on Kodi1 technology for popular Amlogic hardware.
TV Boxes purchased for upgrade available on Amazon. Here have installed Armbian - Homeseer - HA for micro automation servers in the past.
Amlogic S905X4 TV Box Android 11.0 TV Box HK1 Box 4GB RAM 64GB ROM Dual-WiFi 2.4GHz/5GHz BT Quad Core 64 Bits 3D/8K 1000M Smart TV Box
CPU:Amlogic S905X4 64-bit quad core ARM Cortex A55 CPU
Very easy to upgrade and test. You write the OS on a micro SD card. Change one configuration file and boot up.
1 - download current release of firmware
CoreELEC-Amlogic-ne.arm-20.0-Nexus-Generic.img.gz
2 - write firmware to SD card (32, 64 or 128Gb). Personally do not keep any files / movies on my SD cards using balenaEtcher.
Note balenaEtcher works in Linux, Windows or Apple.
3 - personally here use Linux GParted to expand second partition to full size of SD card.
4 - look at this listing of current device tree directory found on the boot partition = > Device Tree
For the above mentioned TV box used this device name ==>
Devices with S905X4 - S905X4- 4G (1GBit)
sc2_s905x4_4g_1gbit
5 - copy sc2_s905x4_4g_1gbit file to root of boot partition and rename the file to dtb.img
6 - install the SD card in to your TV box.
7 - use toothpick method to boot up SD card.
Disconnect the power supply, insert the CoreELEC prepared SD, push and hold the reset button (in the audio output jack) and reconnect the power, wait until CoreELEC logo appears and release the button.
8 - Updating (for later versions) -
Download the latest .tar file from here.
Copy the .tar file to the /storage/.update folder on your device.
Reboot to start the update process.
9 - Personally use NFS mapping here to my XigmaNAS box.
10 - Back up current configuration on Kodi 18.X box. (note that this takes a while and writes to SD card or any network directory).
Use Kodi back up to compressed file.
11 - here used SFTP to transfer back up file from old to new box.
12 - Database will be copied with NFS mapping. Add ons will update or not. (which doesn't matter to me).
13 - back up of Kodi 18 to restore of Kodi 20 did not work.
14 - all I needed though was the NFS mapping which I copied and installed to the new KODI box. (using sftp)
/storage/.config/autostart.sh. I created new directories under storage and mapped shares to directories prior to a reboot.
NAS box is using XigmaNAS BSD OS which is ZFS to SAS drives / controller.
15 -
How to configure VFD
- Goto Arthur’s VFD repository here
- Download the configuration that matches your device and rename it to vfd.conf.
IE: used hk1-rbox-x4-vfd.conf
- Make sure that you save the file as Raw.
- Copy the vfd.conf to /storage/.config on your device.
- Install OpenVFD Service via the CoreELEC repository in Kodi.
- Reboot and enjoy
The boxes are running Kodi 18.X and have not been able to upgrade to Kodi 20.X due to S912 (octocore) hardware limitations.
These boxes are my STBs whick stream live video from HDHomerun boxes (and record if I want), NAS box, Netflix, AOD (et al with subscriptions).
Note these sold TV Boxes come with Android running on the eMMC. You boot up these boxes with a new Kodi OS called CoreElec.
CoreELEC is a ‘Just enough OS’ Linux distribution based on Kodi1 technology for popular Amlogic hardware.
CoreELEC 20.0-Nexus (January 17th, 2023)
CoreELEC 20.0-Nexus is now available. We have come a long way to the first stable Kodi Nexus release, and there have been big changes in CoreELEC. It is based upon Kodi Nexus v20.0 final.
CoreELEC 20 becomes the active development branch and it is based on CoreELEC 19. With CoreELEC 20 the new device, Amlogic-ne: New Era will get introduced. All devices that support CoreELEC 19 Amlogic-ng will also support CoreELEC 20.0 Amlogic-ng.
Device Amlogic-ng hardware support will end with Amlogic SoC SC2 (S905X4).
Device Amlogic-ne will support hardware since Amlogic SoC SC2 (S905X4) and newer like S4 (S905Y4, S905W2) or T7 (A311D2).
With the release of device Amlogic-ne, Amlogic-ng will be become EOSD.
TV Boxes purchased for upgrade available on Amazon. Here have installed Armbian - Homeseer - HA for micro automation servers in the past.
Amlogic S905X4 TV Box Android 11.0 TV Box HK1 Box 4GB RAM 64GB ROM Dual-WiFi 2.4GHz/5GHz BT Quad Core 64 Bits 3D/8K 1000M Smart TV Box
CPU:Amlogic S905X4 64-bit quad core ARM Cortex A55 CPU
Very easy to upgrade and test. You write the OS on a micro SD card. Change one configuration file and boot up.
1 - download current release of firmware
CoreELEC-Amlogic-ne.arm-20.0-Nexus-Generic.img.gz
2 - write firmware to SD card (32, 64 or 128Gb). Personally do not keep any files / movies on my SD cards using balenaEtcher.
Note balenaEtcher works in Linux, Windows or Apple.
3 - personally here use Linux GParted to expand second partition to full size of SD card.
4 - look at this listing of current device tree directory found on the boot partition = > Device Tree
For the above mentioned TV box used this device name ==>
Devices with S905X4 - S905X4- 4G (1GBit)
sc2_s905x4_4g_1gbit
5 - copy sc2_s905x4_4g_1gbit file to root of boot partition and rename the file to dtb.img
6 - install the SD card in to your TV box.
7 - use toothpick method to boot up SD card.
Disconnect the power supply, insert the CoreELEC prepared SD, push and hold the reset button (in the audio output jack) and reconnect the power, wait until CoreELEC logo appears and release the button.
8 - Updating (for later versions) -
Download the latest .tar file from here.
Copy the .tar file to the /storage/.update folder on your device.
Reboot to start the update process.
9 - Personally use NFS mapping here to my XigmaNAS box.
10 - Back up current configuration on Kodi 18.X box. (note that this takes a while and writes to SD card or any network directory).
Use Kodi back up to compressed file.
11 - here used SFTP to transfer back up file from old to new box.
12 - Database will be copied with NFS mapping. Add ons will update or not. (which doesn't matter to me).
13 - back up of Kodi 18 to restore of Kodi 20 did not work.
14 - all I needed though was the NFS mapping which I copied and installed to the new KODI box. (using sftp)
/storage/.config/autostart.sh. I created new directories under storage and mapped shares to directories prior to a reboot.
NAS box is using XigmaNAS BSD OS which is ZFS to SAS drives / controller.
Code:
#!/bin/sh
 (sleep 30; \
 mount -t nfs 192.168.244.137:/mnt/ZFS0/Video /storage/video -o nolock; \
 mount -t nfs 192.168.244.137:/mnt/ZFS0/Pictures/Albums /storage/pics -o nolock; \
 mount -t nfs 192.168.244.137:/mnt/ZFS0/Music /storage/music -o nolock; \
  )&
15 -
How to configure VFD
- Goto Arthur’s VFD repository here
- Download the configuration that matches your device and rename it to vfd.conf.
IE: used hk1-rbox-x4-vfd.conf
Code:
# This file must be renamed to vfd.conf and placed in the /storage/.config/ folder.
#
# HK1 RBOX X4 (S905X4) configuration
#--------------------
#gpio_xxx:
# [0] 0 = &gpio, 1 = &gpio_ao.
# [1] pin number - https://github.com/openSUSE/kernel/blob/master/include/dt-bindings/gpio/meson-g12a-gpio.h
# [0] Reserved - must be 0.


vfd_gpio_clk='0,1,0'
vfd_gpio_dat='0,0,0'
vfd_gpio_stb='0,0,0xFF'


#chars:
# < DHHMM > Order of display chars (D=dots, represented by a single char)


vfd_chars='0,4,3,2,1'


#dot_bits:
# Order of dot bits. Typical configurations:
# Display Type 0, 1 usually has Alarm, USB, Play, Pause, Col, Ethernet, Wifi dots
# Alarm = 0, USB = 1, Play = 2, Pause = 3, Col = 4, Eth = 5, Wifi = 6
# Display Type 2 usually has APPS, USB, SETUP, CARD, Col, HDMI, CVBS dots
# APPS = 0, USB = 1, SETUP = 2, CARD = 3, Col = 4, HDMI = 5, CVBS = 6
# Display Type 3 Power, LAN, Col, Low Wifi, High Wifi
# N/A = 0, N/A = 1, Power = 2, LAN = 3, Col = 4, Low Wifi = 5, High Wifi = 6


vfd_dot_bits='0,1,3,2,4,5,6'


#display_type:
# [0] - Display type.
# [1] - Reserved - must be 0..
# [2] - Flags. (bit 0 = '1' - Common Anode display)
# [3] - Controller.


vfd_display_type='0x00,0x00,0x00,0x06'
- Make sure that you save the file as Raw.
- Copy the vfd.conf to /storage/.config on your device.
- Install OpenVFD Service via the CoreELEC repository in Kodi.
- Reboot and enjoy
Last edited:


