Window/Door contacts for ELK M1

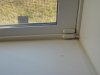
Looks like vinyl or some sort of plastic window from the picture.

We install surface mount contacts with screw down terminals. Put the contacts in the corners of window and frame if possible (far left, far right). This way when you install Venetian blinds, or curtains they will be mostly likely hidden by the curtain...
945t_pr.lg.jpg
 
For recessed, I like the 944T's (diameter and magnets depending on install) and 955PST's for plungers.

I took your advice and bought about four dozen of these to wire my all-wood double-hung windows throughout my house. I also bought the corresponding 3/4" sensors for my wood doors. We're in the middle of a major remodel so most walls are open and accessible.

This is my first time installing security wiring and I've learned a lot through the forums. I have several spools of 22/4 wire ready to go, along with a Leviton panel that will at some point house an Elk M1. I've bought into the theory of grouping several sensors into a zone, with an end of line resistor at the last sensor. My question is how do I physically connect all the sensors? The attachment point at the sensor is clear enough, but how do I link one sensor to the next within a zone? Do I need to splice the wires and leave those connections inside the wall?

I've also read that some prefer to homerun each sensor, grouping them in the box. What is the best method? Running the wires is relatively easy at this point, I just don't want to make a mistake I'll regret down the road.

Thank you!
 
Do I need to splice the wires and leave those connections inside the wall?

Yes. You will end up with one splice at each sensor. The last sensor will be the splice with the EOL resistor (if you choose to use them).

If you are confident in your zone assignments and smart about routing, the point-to-point runs can save a lot of wire. When in doubt, the homerun method leaves all options available.
 
Thank you for your response. My 22/4 wire is red/black/green/yellow, but my understanding is that I really only need to use two of those. I planned the point-to-point approach, so let's work with that plan.

It sounds like I would need two lengths of 22/4 pulled to each sensor. At the first sensor, I would have one length of 22/4 from the panel and one length of 22/4 leading to the next sensor. Let's assume I use red and black for my circuit, ignoring green and yellow. At this first sensor, I'd connect the a red (high) to each side of the sensor (Honeywell 944T's with the screw attachments), and I'd splice the two blacks (low) to each other. At the last sensor, I'd connect the red to one side of the sensor and black to the other side by way of an inline EOLR.

At each sensor I would use a butt splice and tape, pushing the connectors up in the hole for the sensor. Is there a more elegant way to do this?
 
I believe you have it! If you want to save more of the 22/4, you can use the green/yellow pair for another nearby zone and avoid the run from the panel to the first sensor on the second zone.
 
I'm about to install the Tane's this weekend and would love to see some pictures of them installed. I have the screw terminal ones but any of them or just for a visual aid any surface mounts would help. I'm trying to figure out how to install them in the cleanest manner.
 
My advice would be to select sensors that can be hidden as much as possible. Clearly, the key is getting the wires run to the right places. When I did my house, I found that the cheapest wire was Cat5e cable so I ran it to every window and door. If you use casement windows, the windows usually have a channel at the bottom where the window hinge swings into. I mounted my sensors in the channels which lets you get to them by opening the window but they are hidden and protected from the weather when the window is closed. If you use EOL resistors, they can be placed in with the switches.

On doors, you can either use a hinge plunger switch or use the cylinder type where you drill a hole in the top or bottom of the door out near the latch side for the magnet and put the switch in the jam next to the magnet.

The key is to pick your sensor type before you place the wires so you know where to position the wires in the rough opening. Sliders can be done with cylinder switches in the jam above or below the latch area. If you plan to connect all windows in one room to a single zone, you need to daisy chain the wiring from one window to another.
 
I'm about to install the Tane's this weekend and would love to see some pictures of them installed. I have the screw terminal ones but any of them or just for a visual aid any surface mounts would help. I'm trying to figure out how to install them in the cleanest manner.

I noted to myself to get you pics but I forgot. Now that this thread popped up again I will try to get pics today.

I used these contacts for my casement (crank-out) and horizontal gliding windows. Worked out really well for the casements because they were small enough to be almost 100% hidden by the frame of the screen (since the screen mounts on the interior). I drilled a small hole in the recess for the screen to feed the contact wire through. 1/8" was just about perfect for a 22/2 wire. I put the contacts themselves in an upside-down L shaped pattern, the sensor portion mounted vertically and the magnet mounted horizontally on the moving sash so it meets up with the sensor when closed.

For my doors I used Tane door contacts, basically a flat flanged piece that sets into the frame and the door slab. To me, anything mechanical (rollers, plungers, etc) is a bad idea because it will "go bad" at the worst possible moment (3AM in the morning, or even worse it wont trip when it HAS to). I used magnetic contacts everywhere except for my deadbolt sensors (since those are non-alarm and really just optional).

-Chris
 
No worries Chris I know how it is. I have double hung windows but would like to see how you did it when you get a chance.
 
I'm about to install the Tane's this weekend and would love to see some pictures of them installed. I have the screw terminal ones but any of them or just for a visual aid any surface mounts would help. I'm trying to figure out how to install them in the cleanest manner.

I did order ones with the side-lead, but got end-lead instead. I wasn't going to wait to exchange them so I used them anyway. With side-leads you wouldn't see any wire at all.
 

Attachments

  • Window Sensor.jpg
    Window Sensor.jpg
    58.7 KB · Views: 39
For doors I love the GE recessed wireless sensors. Once installed you can not see them at all. The battery lasts 5-7 years per manufacturers instructions.
 
Back
Top