Keypad Wiring Question

dsabot

Member
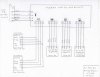
I am busy installing my new Elk M1 system and ran into a strange problem. I have three keypads in my home. Each keypad is connected to a separate homerun to the control panel. I didn't install any resistors or jumpers on the keypads. I was able to enroll all of them, and gave them all different numbers so there are no conflicts. I wired 5 zones to my system so far. Each of these zones has the 2200 resistor on one end. For some zones, when I open the door or window, I hear the chime. On other zones I do not. I have not modifed any default settings.

1) Do keypads need resistors and/or jumpers if they are each on their own home run?
2) In the control unit, does it matter which of the two wires from a zone goes to Neutral?
3) In the control panel, does it matter which direction the resistor bands face ?

Thanks in advance and happy Memorial Day.
 
If you are going to run alot of homerun buses I would use the M1DBHR retrofit hub. Do you have a meter? Measure the resistance between A and B at the control. If it is not in the approx 60-70 ohm range, you have a problem and need terminating resistors.

1. I never had more than 2 homeruns, but each end of the bus needs to be terminated. Check the resistance of the bus as above.
2. Nope
3. If you are installing resistors at the panel you are wasting your time. If you want/need EOL's, then install them at the contact or sensor end. If you are not going to do that, just leave them off and configure the zone as Normally Closed. But no, in general it does not matter which way they go.

When you say that each end of the BUS needs to be terminated can you explain just a bit more? I am using existing wiring that is in the house where they already had keypads. I really didn't want to install a hub if possible. If you are saying that the KEYPAD is a bus, then how does one terminate it on the keypad, and then back at the control unit. It just seems odd to me that some zones create a chime, and others dont.
 
When you say that each end of the BUS needs to be terminated can you explain just a bit more? I am using existing wiring that is in the house where they already had keypads. I really didn't want to install a hub if possible. If you are saying that the KEYPAD is a bus, then how does one terminate it on the keypad, and then back at the control unit. It just seems odd to me that some zones create a chime, and others dont.

What Steve means by "bus" is the two data lines which go to the keypads from the control panel. Their are four wires that go to a keypad, two for "data" and two for "power". You are saying you have "home runs" to all three keypads, so you must have each keypads Data A in one terminal screw (on the control panel), Data B on the other terminal screw and all plus and minus power lines to the power supply terminal screws (positive and negative).

In this scenario you must terminate each keypad via it's termination switch. Look at the manual for its location.

A data base hub would have made the terminations a little neater (rather than stuffing all those wired on one terminal screw), but you can do this without one.

I also believe that the control panel itself needs to be terminated as well, but the Elk manual should say so.


EDIT: I'm not sure you can run more than two keypads in a home run situation. According to the instructions on page seven HERE the manual states that the bus does not want to see more than two termination points.
 
David;

I re-read the manual and I'm pretty sure you can't home run all three of your keypads. Reason as I stated above is the data bus does not want to see more than two terminations.

So your options are to get a DBHR hub as Steve suggested above, or run another set of wires to one of the keypads and "series" it with one of the two other keypads.

I'm sure someone will correct me if I'm wrong...

Just for grins I attached a schematic of how I implemented a DBHR hub for my friend's Elk install. You can do the same except just keep the JP2 output for future use.

Regards,

BSR
 

Attachments

  • hubwiring.JPG
    hubwiring.JPG
    47.6 KB · Views: 94
I have a never-used hub if you want it (purchased and decided not to homerun everything in the end)... i paid 27.81 at asihome...

-brad
 
Thanks for everyones help on this. I actually have a retrofit hub. I just installed it. I put a jumper on the control unit JP3, and a jumper on JP1-4 on the retro hub. I wired each keypad to a separate branch. I put jumpers on all the keypads. I went through the enroll process again and made sure each keypad has its own number 1-3. Keypad 1 for some reason shows READY TO ARM, the time and date will cycle and it says AREA 1, the other two keypads just say READY TO ARM, nothing else. Some doors and windows will cause the chime to go off, two of them wont. I can't figure out why. I never changed a single default on the keypads.
 
Thanks for everyones help on this. I actually have a retrofit hub. I just installed it. I put a jumper on the control unit JP3, and a jumper on JP1-4 on the retro hub. I wired each keypad to a separate branch. I put jumpers on all the keypads. I went through the enroll process again and made sure each keypad has its own number 1-3. Keypad 1 for some reason shows READY TO ARM, the time and date will cycle and it says AREA 1, the other two keypads just say READY TO ARM, nothing else. Some doors and windows will cause the chime to go off, two of them wont. I can't figure out why. I never changed a single default on the keypads.

Some zones may be set to chime and others not. Also each keypad may be configured differently and that is why the display is different.

I would use RP and check each active zone. You should see some set to chime and others not. Then check each keypad in RP and I am sure you will see the differences in the check boxes.

It will take a few hours of experimenting to get the hang of it and then you should have fun tweaking the system the way you want it.


Thanks for the info. I dont have RP, I guess I will have to put a request in to download it, hopefully they aren't too backlogged with requests from the holiday. Hopefully my USB to serial port adapter will work ok. The odd thing is, I never changed anything on the keypads so I am not sure why some would and some wouldn't chime.

Dave

Sent you a PM
 
I installed my Keypads and M1XSP before I knew about the data hub. Fortunately, the instructions were pretty good, and I was able to come up with a good working solution. However, it is complicated, and I wish I went the data hub route. My Keypads are all homerun with CAT5 (I even have a spare CAT5 at each KP.... just in case). Do I need th retrofit, or can I use the regular? Here is how I currently have everything hooked up:

http://pelorus.org/WiringDiagram.pdf (1.2 MB)
 
You need to read the section on data bus wiring in the M1 manual. It is around page 7. The M1 uses a RS-485 data bus with a data rate of 38400 baud. A RS-485 data bus requires the bus to be terminated at each end with a termination resistor. These resistors are installed on the control and each module. There are two black jumpers for activating the terminating resistors at the extreme ends of the data bus. No more than two jumpers, no less than two jumpers. As stated earlier in this thread, the resistance across data A and data B bus lines with the power off should be about 65 ohms +- 10 ohms.

If you have 3 home runs with only 4 conductor wire for each run, you will need the M1DBHR so that the bus can be properly terminated. Two of your keypads connected to the M1 will work fine. The third keypad will not be wired in series with the bus and may seem to work OK, but strange things can happen to its data. If you have run CAT5, 8 conductor wire, then you can wire the 3rd keypad in series with the data bus without the M1DBHR. Read the manual on how to do this.

It sounds like your keypad program settings are not the same for each keypad. You can change them with keypad installer programming or use ELKRP which is easier. Make sure you read the M1 into ELKRP first, then start changing things. Then send the changed information back to the M1.

Happy M1ing!!
 
Spanky, since this was your first post in this thread, I am not sure if you are responding to the OP or my post (#12). I am wondering if you thought my wiring was incorrect. I have CAT5's which were pre-wired home run style to my wiring closet. I have four devices on my data bus--three KPs and one XSP. I have connected two KP in series, and terminated the end KP, and I have the other KP and the m1XSP in series, and terminated the KP. I believe this is in accordance with the instructions. Looking at the instruction manual for the DBH, I think it is the right product for me.

Skip
Not to answer for Spanky, but I think if you can crimp on RJ45's then yes the DBH hub is the better product for you. The DBH uses 6 wires and daisy chains the devices thru the hub whereas the DBHR breaks the bus into 4 separate managed buses which is the better product if you only have 4 wires run already (since you can not daisy chain).
 
Back
Top