Assistance w/replacing older Brinks with new DIY installation?

@RAL and @DEL-  Sorry for the delay in getting back to you all but I have some other things going on at the residence right now (contractors doing various things) so it's pretty hectic to say the least.
 
@RAL-  Thanks for your response....I am still attempting to find out if I have EOL resistors but should be able to clear that up tonight...hopefully.
 
@DEL-  Just to clarify a few things that you stated in your last post....no double receiver option with 20P meaning you can't use multiple RF keypads correct?  And you are also saying to just buy the regular 6160 kepads (not RF version) because the installer ran a wire for receiver in close.  I did locate the receiver in the hall closet but not sure if it can be used with the 20P system or do I need to get a different one?  We can cross that bridge later when I am ready to add more sensors (wireless glass, etc) to the system.  Right now I am just trying to get everything up and running as is to have an alarm panel in action.
 
I am pretty sure I have a siren because I remember setting it off a few times (left the motion on with alarm activated and walked in the hallway by mistake).  Thanks for the info on whether the 7AH battery will fit.
 
I am ready to purchase the stuff I need so just wanting to confirm the keypads "I think" at this point so I can get moving.  Everything else above (panel, battery) should at least get me a good start...yes?
 
There's really no benefit to a integrated keypad with receiver other than economic, which is moot if the keypad wears and requires replacement. Also, generally the best location for a RF receiver isn't necessarily where the keypads are located.
 
DELInstallations said:
There's really no benefit to a integrated keypad with receiver other than economic, which is moot if the keypad wears and requires replacement. Also, generally the best location for a RF receiver isn't necessarily where the keypads are located.
Ok...thx for the helpful "insider" information...considering you install these all the time:)
 
I will just go with the regular keypads and use the separate RF receiver in the future when I add my additional wireless sensors.
 
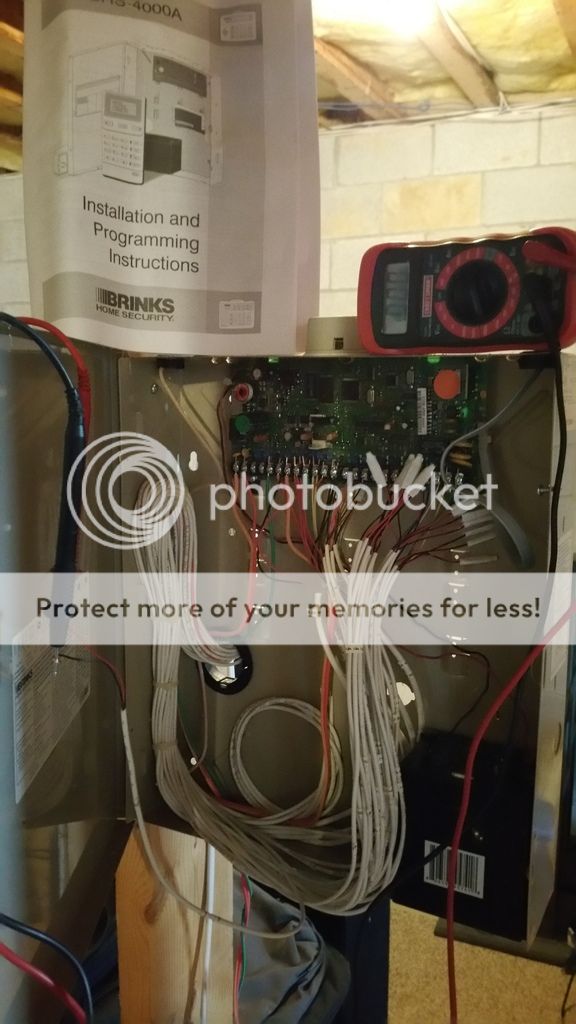
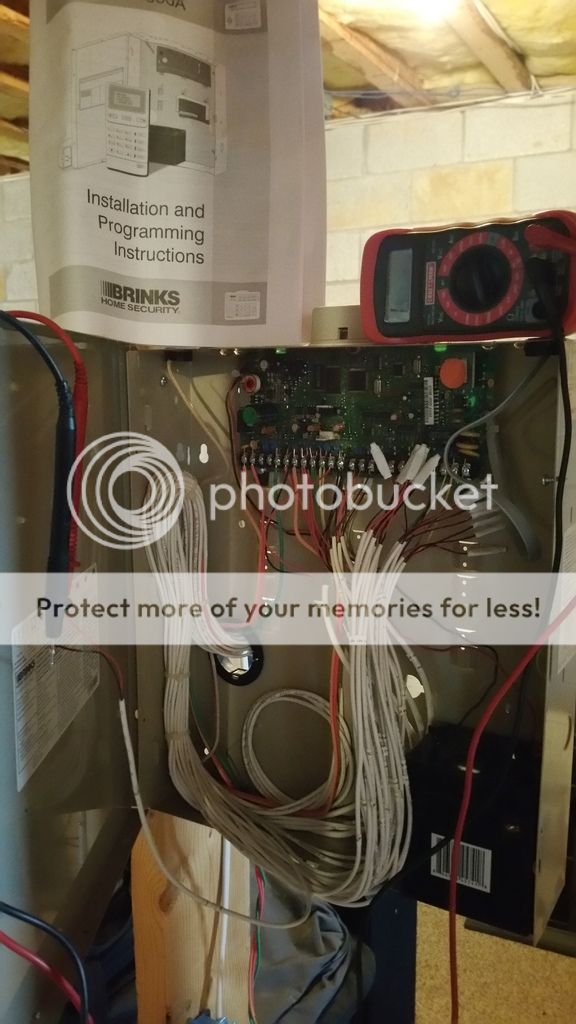
Just wanted to clarify...I noticed that most of the wires have leads that under "capped" together using those white heat shrink looking things...I assume that is because I have zones that are combined...for instance (kitchen and living room sensors on zone 4 for example)?  Also, it appears there are little white tags on each wire indicating what zone it belongs to and some have multiple tags.
 
Also, I got a chance to test for EOL and from what I understand I do not have any.  See pics below:  When I put the meter on and test with door contact closed it is reading 0.00


When I open the door the reading goes back to 1
 
 
vacationer said:
Ok...thx for the helpful "insider" information...considering you install these all the time:)
 
I will just go with the regular keypads and use the separate RF receiver in the future when I add my additional wireless sensors.
 
Just wanted to clarify...I noticed that most of the wires have leads that under "capped" together using those white heat shrink looking things...I assume that is because I have zones that are combined...for instance (kitchen and living room sensors on zone 4 for example)?  Also, it appears there are little white tags on each wire indicating what zone it belongs to and some have multiple tags.
 
Also, I got a chance to test for EOL and from what I understand I do not have any.  See pics below:  When I put the meter on and test with door contact closed it is reading 0.00
 
 
When I open the door the reading goes back to 1
 
From your readings, it looks like you don't have EOL resistors, so that makes changing to a new panel simpler.
 
Those cable to cable connections that you see with the white "caps" are splices done with "B-connectors" also known as Dolphin connectors.  It's a little hard to tell from the picture, but it looks like all those cables are 2-wire cables, with a black and red wire crimped with each B-connector.  Those are probably connecting a group of window sensors together to form each of the zones.
 
@RAL and @DEL-
 
Final "Initial" Parts List Check:  Just wanted to be sure I am good to go with the below parts to get me up and running with current setup before I pull the trigger with ordering.  Sorry to be such a PITA!
 
-Honeywell VISTA-20P Control Panel (With EYEZ-ON EVL-3 Self Monitoring Module):  https://www.amazon.c...pf_rd_i=desktop
 
-(2) Honeywell Security 6160 Ademco Alpha Display Keypad:  https://www.amazon.c...42373E99DESSH4H
 
Not going to do the RF version.  When it's time to add wireless sensors I will just reuse or buy a separate receiver.
 
-12 Volt 7 Amp Hour Alarm Battery:  https://www.amazon.c...5V1V2YMV5ZD34MX
 
Once everything arrives...can one of you kind of give me some insight on first steps or what I should accomplish first as this is my first system install so I am kind of in the dark in regards to initial steps.  For example, should I be planning out what zones I want or keep things simple and go with the 8 zones I have now?  Do I need to undo any of the current wire pairs that may have multi room windows / doors tied together into one zone or can I just leave as if it I feel it "worked" when the Brinks system was setup?  Any other first step tips I should be aware of.....
 
I'd like to get the feedback on this parts list as soon as someone has time to respond so I can get ordered from Amazon and get started.  Thanks for everyone's help so far...I am super excited to get an alarm back in action...I just hope I can get it working.
 
vacationer said:
@RAL and @DEL-
 
Final "Initial" Parts List Check:  Just wanted to be sure I am good to go with the below parts to get me up and running with current setup before I pull the trigger with ordering.  Sorry to be such a PITA!
 
-Honeywell VISTA-20P Control Panel (With EYEZ-ON EVL-3 Self Monitoring Module):  https://www.amazon.c...pf_rd_i=desktop
 
-(2) Honeywell Security 6160 Ademco Alpha Display Keypad:  https://www.amazon.c...42373E99DESSH4H
 
Not going to do the RF version.  When it's time to add wireless sensors I will just reuse or buy a separate receiver.
 
-12 Volt 7 Amp Hour Alarm Battery:  https://www.amazon.c...5V1V2YMV5ZD34MX
 
Once everything arrives...can one of you kind of give me some insight on first steps or what I should accomplish first as this is my first system install so I am kind of in the dark in regards to initial steps.  For example, should I be planning out what zones I want or keep things simple and go with the 8 zones I have now?  Do I need to undo any of the current wire pairs that may have multi room windows / doors tied together into one zone or can I just leave as if it I feel it "worked" when the Brinks system was setup?  Any other first step tips I should be aware of.....
 
I'd like to get the feedback on this parts list as soon as someone has time to respond so I can get ordered from Amazon and get started.  Thanks for everyone's help so far...I am super excited to get an alarm back in action...I just hope I can get it working.
 
Your list looks ok to get started.  Consider adding a surge suppressor like the Elk 950 (for ac power and phone line).
 
Before you do anything, watch some of the Vista 20P installation videos on YouTube.
 
One thing you might want to do is a bench test first, where you wire up the 20P and keypads on your kitchen table (or wherever) without connecting it to any of the existing wiring to get familiar with the new components and make sure it all works.  You'll need some extra wire to connect the keypads, etc.   If you don't have any real alarm contacts handy, you can use jumper wires to make the zone inputs appear as if they are open/closed.  That way, you'll know how it behaves in a simple environment.
 
Once you feel comfortable that you know how it all works, then install it in the enclosure and connect it up to the existing wiring.
 
I wouldn't change your zone wiring initially.  Just leave it as-is and wire it up to the 20P pretty much as it was on the Brinks. See if you can get the 20P working with that first. 
 
If you start rewiring the zones before you have something that works, it just makes lots of new opportunities for a problem and then it will be more difficult to track down what's wrong.
 
So take it slow and make small steps.  Once you have it working with the existing zones, then you can start changing the zone configuration.  I would do that in small steps, too.  Change one zone at a time. Test it and make sure it works, then move on to the next zone to be changed.
 
RAL said:
Your list looks ok to get started.  Consider adding a surge suppressor like the Elk 950 (for ac power and phone line).
 
Before you do anything, watch some of the Vista 20P installation videos on YouTube.
 
One thing you might want to do is a bench test first, where you wire up the 20P and keypads on your kitchen table (or wherever) without connecting it to any of the existing wiring to get familiar with the new components and make sure it all works.  You'll need some extra wire to connect the keypads, etc.   If you don't have any real alarm contacts handy, you can use jumper wires to make the zone inputs appear as if they are open/closed.  That way, you'll know how it behaves in a simple environment.
 
Once you feel comfortable that you know how it all works, then install it in the enclosure and connect it up to the existing wiring.
 
I wouldn't change your zone wiring initially.  Just leave it as-is and wire it up to the 20P pretty much as it was on the Brinks. See if you can get the 20P working with that first. 
 
If you start rewiring the zones before you have something that works, it just makes lots of new opportunities for a problem and then it will be more difficult to track down what's wrong.
 
So take it slow and make small steps.  Once you have it working with the existing zones, then you can start changing the zone configuration.  I would do that in small steps, too.  Change one zone at a time. Test it and make sure it works, then move on to the next zone to be changed.
RAL-
 
Thanks again for the response...really appreciate the assistance!  Just to comment on a few things.  I like the idea of adding a surge suppressor to the unit....but I am not going to have a phone line per say connected just a RJ-45 jack for network connectivity for the EVL-3 so not sure if that will still work?
 
Also, I have been watching a few YouTube vids of adding zones, custom zone types, etc by a guy named zimsjeep.  I will rewatch and rewatch and rewatch again though and see what sinks in:)
 
I like the idea of bench testing the components first...great suggestion.  Only thing is not to sound stupid..I am not really sure how to make a jumper wire to imitate zones?  I can purchase an alarm contact if you think I should...or if you could just point me in the right direction on how to make a jumper I am sure I can figure it out....
 
I agree with your final points of leaving everything as is...once it is up and running I can tweak from there.  As far as I am concerned, when it was up and running from Brinks it worked for us just fine so why mess with a good thing:)
 
I plan on placing the order tonight from Amazon so thanks again for helping me out countless times.
 
vacationer said:
RAL-
 
Thanks again for the response...really appreciate the assistance!  Just to comment on a few things.  I like the idea of adding a surge suppressor to the unit....but I am not going to have a phone line per say connected just a RJ-45 jack for network connectivity for the EVL-3 so not sure if that will still work?
 
Also, I have been watching a few YouTube vids of adding zones, custom zone types, etc by a guy named zimsjeep.  I will rewatch and rewatch and rewatch again though and see what sinks in:)
 
I like the idea of bench testing the components first...great suggestion.  Only thing is not to sound stupid..I am not really sure how to make a jumper wire to imitate zones?  I can purchase an alarm contact if you think I should...or if you could just point me in the right direction on how to make a jumper I am sure I can figure it out....
 
I agree with your final points of leaving everything as is...once it is up and running I can tweak from there.  As far as I am concerned, when it was up and running from Brinks it worked for us just fine so why mess with a good thing:)
 
I plan on placing the order tonight from Amazon so thanks again for helping me out countless times.
 
If you are not going to have a phone line connected, then you don't necessarily need all the function of the Elk 950.  It's still not a bad idea to install an AC surge suppressor for the 20P's transformer, even if you have a whole house surge suppressor already.  You could still use the 950's AC section on the low voltage side of the transformer for this.
 
Or another way is with an AC outlet surge suppressor, like this one. The down side is that it does not have a center screw hole to allow you to secure the transformer.  I mounted one of those in a double gang box and put a regular receptacle beside it, which allows me to mount the transformer.
 
For the jumpers for the zones, just connect a short wire between the two terminals (HI and LOW) for each zone.  That will simulate a normally closed contact.  Then, after you configure the zones, you can arm the system and test each zone by creating an alarm condition by disconnecting one end of the wire.
 
I had a Vista20P panel before I transitioned to the Elk panel. I still have some Ademco parts that I need to get rid of if you are interested. I sent you a PM.
 
I've been needing to get rid of them for about 3 years and it's just also been LOW priority. Now that we put an offer in on another home and will be moving soon, getting rid of equipment means less I have to put into storage. 
 
RAL said:
If you are not going to have a phone line connected, then you don't necessarily need all the function of the Elk 950.  It's still not a bad idea to install an AC surge suppressor for the 20P's transformer, even if you have a whole house surge suppressor already.  You could still use the 950's AC section on the low voltage side of the transformer for this.
 
Or another way is with an AC outlet surge suppressor, like this one. The down side is that it does not have a center screw hole to allow you to secure the transformer.  I mounted one of those in a double gang box and put a regular receptacle beside it, which allows me to mount the transformer.
 
For the jumpers for the zones, just connect a short wire between the two terminals (HI and LOW) for each zone.  That will simulate a normally closed contact.  Then, after you configure the zones, you can arm the system and test each zone by creating an alarm condition by disconnecting one end of the wire.
Thanks for the info about the surge suppressor.  The link you attached I am familiar with.  I have installed a few of those behind flat panel tv's for surge protection in the past.  Not sure I quite understand what your saying about how you mounted it in a double gang box which allows you to use the screw on the transformer...maybe a pic if you have a spare moment would be helpful?
 
Also, thanks for the info on how to create jumpers for the zones with wires.  Makes sense and I will def consider doing that.
 
Just to provide you an update...I ordered the panel, two keypads, and battery over the weekend so everything should be here (other than the main panel) by mid-week.  There was no prime shipping on the panel so ship date is not until the 17th or so.  Anyway...it gives me some additional time to continue watching videos and online tutorials on programming which I have been doing a lot of today.
 
With that being said, I do have some questions so far:
 
1.  I noticed a lot of online videos and manuals saying you have to use zone 1 as fire and that cannot be changed.  On my old system zone 8 was "smoke" so I guess I will have to move that to zone 1 now with the new 20p.  It also mentioned something about zone 1 having EOL resistors in order to work but I am not sure if I have that on my current setup.  According to DEL I should replace my smoke detector because it's been 10 years and I am good with that.  Any suggestions for a "wired" smoke?  All I have come across is wireless but my system was installed with a wired smoke.
 
2.  Partitions....I believe I read you can have up to 3 partitions with the 20p but I have no idea when or how you would use different partitions.  I feel fairly confident my current setup would prob only require everything being programmed under one partition at least for now but wanted to get a better explanation of that.
 
3.  Addressing keypads....I changed up my order just a little and order (1) 6160 and (1) RF version for the upstairs bedroom since that it where a majority of the future wireless sensors will be installed at a later date.  I believe you have to "address" the keypads when you are first programming them with code 16 or 17.  Does it matter which keypad I make 16 or 17 or does one take preference over the other?
 
I think that is it for now....thanks for any assistance you can provide.
 
vacationer said:
Thanks for the info about the surge suppressor.  The link you attached I am familiar with.  I have installed a few of those behind flat panel tv's for surge protection in the past.  Not sure I quite understand what your saying about how you mounted it in a double gang box which allows you to use the screw on the transformer...maybe a pic if you have a spare moment would be helpful?
 
Also, thanks for the info on how to create jumpers for the zones with wires.  Makes sense and I will def consider doing that.
 
Just to provide you an update...I ordered the panel, two keypads, and battery over the weekend so everything should be here (other than the main panel) by mid-week.  There was no prime shipping on the panel so ship date is not until the 17th or so.  Anyway...it gives me some additional time to continue watching videos and online tutorials on programming which I have been doing a lot of today.
 
With that being said, I do have some questions so far:
 
1.  I noticed a lot of online videos and manuals saying you have to use zone 1 as fire and that cannot be changed.  On my old system zone 8 was "smoke" so I guess I will have to move that to zone 1 now with the new 20p.  It also mentioned something about zone 1 having EOL resistors in order to work but I am not sure if I have that on my current setup.  According to DEL I should replace my smoke detector because it's been 10 years and I am good with that.  Any suggestions for a "wired" smoke?  All I have come across is wireless but my system was installed with a wired smoke.
 
2.  Partitions....I believe I read you can have up to 3 partitions with the 20p but I have no idea when or how you would use different partitions.  I feel fairly confident my current setup would prob only require everything being programmed under one partition at least for now but wanted to get a better explanation of that.
 
3.  Addressing keypads....I changed up my order just a little and order (1) 6160 and (1) RF version for the upstairs bedroom since that it where a majority of the future wireless sensors will be installed at a later date.  I believe you have to "address" the keypads when you are first programming them with code 16 or 17.  Does it matter which keypad I make 16 or 17 or does one take preference over the other?
 
I think that is it for now....thanks for any assistance you can provide.
 
1.  Yes, with the 20P, 2-wire smokes need to be connected to Zone 1, so you'll need to change that vs your old system.  You must have an EOL resistor connected to the last smoke detector in the chain.  Your existing smoke detectors probably have one, too.  But it may not be the same value that the 20P requires (2000 ohms). 
 
If you install 2-wire smokes, you must use a model that is listed for use with the 20P.  See the list of detectors on page 8-2 of the 20P installation manual.  System Sensor makes good smoke detectors, and there are a number of models you can choose from.  Some of the models in the 20P manual have been discontinued and replaced by newer models (e.g. the 2400 replacement is the 2W-B).  
 
You can get an up to date list here.
 
 
2. Partitions allow you to divide the 20P into several independent systems.  Say you had a 2-family house, and wanted each family to have an alarm system.  You could do that by creating 2 partitions, each with their own sensors and keypads.  Or, say you wanted to protect your house and your garage, and be able to arm and disarm them independently.  Assigning a partition to each area would let you do that
 
3.  It shouldn't matter which address you assign to which keypad.
 
vacationer said:
Thanks for the info about the surge suppressor.  The link you attached I am familiar with.  I have installed a few of those behind flat panel tv's for surge protection in the past.  Not sure I quite understand what your saying about how you mounted it in a double gang box which allows you to use the screw on the transformer...maybe a pic if you have a spare moment would be helpful?
 
Here's a picture of what I was trying to explain earlier.  The power transformer for the 20P uses the center screw of a normal receptacle to hold the transformer in place.
 
But the surge suppressor is a Decora style device, and doesn't have a center screw hole.  So I mounted it in a 2-gang box with a non-Decora type receptacle, and I plug the transformer into the right side in the picture. The  surge suppressor will protect both receptacles.
 
index.php
 
1. The difference is whether or not you are going to wire 2 or 4 wire fire. For simplicity's sake, I'd suggest a novice to wire 2 wire fire and that always needs to be connected to zone 1 on the 20P. As far as compatibles, honestly, partially disregard the manual and look at the compatibility documents on the manufacturer's website. Provides maximum number panel can support and models. The 20P can support up to 16 2 wire detectors on zone 1. That's in the Honeywell/20P listing doc.
 
2. 20P is 2 true partitions and the "3rd" partition is not truly controllable; It has a lobby logic that places it to be common to the other 2 partitions. Basically, you'd never be able to arm it unless the other 2 partitions are armed.
 
3. Address 16 does not have sound option ability. Should be assigned to the primary/entry keypad as a best practice.
 
RAL said:
Here's a picture of what I was trying to explain earlier.  The power transformer for the 20P uses the center screw of a normal receptacle to hold the transformer in place.
 
But the surge suppressor is a Decora style device, and doesn't have a center screw hole.  So I mounted it in a 2-gang box with a non-Decora type receptacle, and I plug the transformer into the right side in the picture. The  surge suppressor will protect both receptacles.
 
index.php
@RAL-
 
Thanks for the pic...I see what your talking about now.  I am not an expert at electrical wiring but I assume when you have one line coming into the surge and then daisy chain it to the other reg outlet both outlets are covered as far as surge protection goes....I wasn't aware of that.
 
I wonder if something like this would work as well:  https://www.amazon.com/dp/B00006BBAC?psc=1
 
It has a center screw I might be able to mount the transformer.
 
DELInstallations said:
1. The difference is whether or not you are going to wire 2 or 4 wire fire. For simplicity's sake, I'd suggest a novice to wire 2 wire fire and that always needs to be connected to zone 1 on the 20P. As far as compatibles, honestly, partially disregard the manual and look at the compatibility documents on the manufacturer's website. Provides maximum number panel can support and models. The 20P can support up to 16 2 wire detectors on zone 1. That's in the Honeywell/20P listing doc.
 
2. 20P is 2 true partitions and the "3rd" partition is not truly controllable; It has a lobby logic that places it to be common to the other 2 partitions. Basically, you'd never be able to arm it unless the other 2 partitions are armed.
 
3. Address 16 does not have sound option ability. Should be assigned to the primary/entry keypad as a best practice.
@DEL-
 
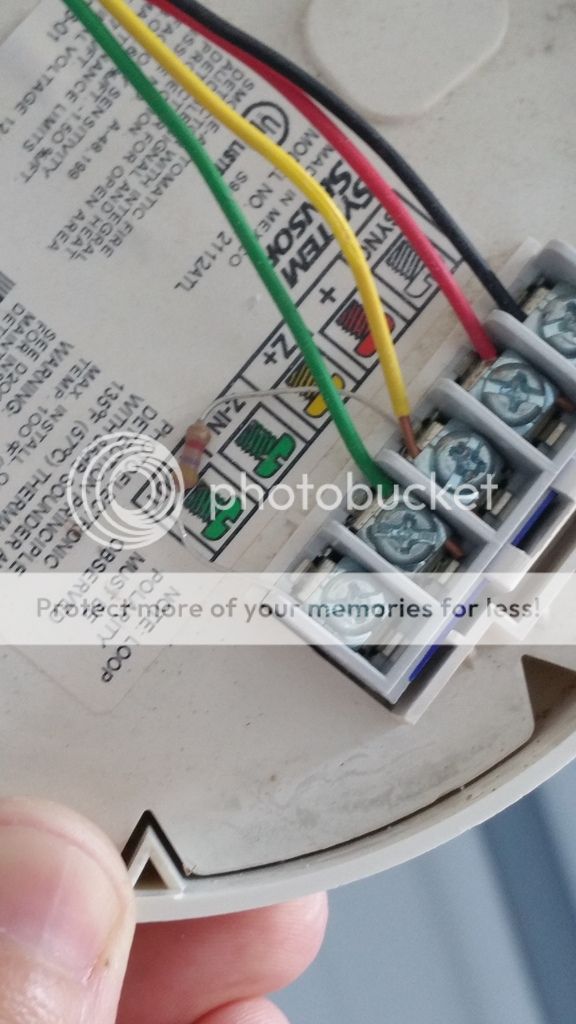
Thanks for chiming in as well....appreciate it.  Currently I have a system sensor smoke 4 wire with resistor attached:


I noticed you said to replace with a 2 wire since I am a novice installer....couldn't I just replace with a similar newer model (4 wire) and follow the hookup as it is now or would the difficulty be hooking it up on the panel end?
 
I am going to look through the list of compatible devices and see what works for the 20p.  Also, any way to tell if that resistor is a 2k so I can reuse it or should I just buy a new one?
 
Here are a few that I found on ebay just not sure the differences in the model numbers:  2W-B vs 2WT-B vs 2WTA-B
 
http://www.ebay.com/itm/SYSTEM-SENSOR-2W-B-Smoke-Alarm-12-24-VDC-2-Wire-w-Base-/331310823796
http://www.ebay.com/itm/SYSTEM-SENSOR-2WT-B-Smoke-Alarm-12-24-VDC-2-Wire-Therm-Sen-/331310895423
http://www.ebay.com/itm/SYSTEM-SENSOR-2WTA-B-Smoke-Alarm-12-24-VDC-2-Wire-Therm-Sen-/331725160015
 
Back
Top