Gosund WiFi dimmer replacing firmware

Thank you gbg108!
 
When I first tested out the firmware, the dimmer values didn't sync with the Tasmota UI, but the MQTT updates were still being sent.
@mehrdadg The issue you may be experiencing is tasmota not refreshing fast enough. The logs should show the updates, though
(with MQTT enabled). Watching the dimmer in Home Assistant looks like the virtual slider is going up and down as I am operating
the touch panel in real time. Amazing! Here are the logs from Tasmota:
 
21:27:16 MQT: stat/dimmer1/RESULT = {"POWER":"ON"}
21:27:16 MQT: stat/dimmer1/POWER = ON (retained)
21:27:18 MQT: stat/dimmer1/RESULT = {"POWER":"ON","Dimmer":60}
21:27:18 MQT: stat/dimmer1/RESULT = {"POWER":"ON","Dimmer":1}
21:27:18 MQT: stat/dimmer1/RESULT = {"POWER":"ON","Dimmer":81}
21:27:18 MQT: stat/dimmer1/RESULT = {"POWER":"ON","Dimmer":92}
21:27:18 MQT: stat/dimmer1/RESULT = {"POWER":"ON","Dimmer":100}
21:27:22 MQT: stat/dimmer1/RESULT = {"POWER":"OFF"}
21:27:22 MQT: stat/dimmer1/POWER = OFF (retained)
 
Tasmota sends several updates per second which looks awesome in Home Assistant.
This might be the best Tasmota dimmer switch now for seamless local control. 
 
@gbg108 thanks for this integration
 
 
How can I change the lowest dimm level for the switch? Is it possible?
 
Hello everybody, thanks for having this thread.  I'm on my very own GS-SW2 journey, and I owe the majority of my progress to you.  considering that I only have this one post today, I'm going to shotgun it:
 
Tasmota minimal uploaded - OK
Tasmota scripting uploaded - OK
template/script imported - OK
 
I am stuck at the point of wonky local dimming.  tapping on the slider registers perfectly, but long/exaggerated slides don't track
 
I've never successfully been able to upload any of the custom binaries shared on this thread, it's always an "upload buffer miscompare"
 
I've tried to restore the Tasmota-minimal firmware, but I'm getting same complaints and can't even seem to roll that back
 
now that there have been several iterations of script/binary, I would throw myself at your mercy to rehash the setup process for the gosund sw2 from start to finish, for those of us with no experience and a middle-school aptitude (-;
 
for mega-extra-bonus points, if anybody is using these dimmers through Homebridge-tasmota (or any other flavor), I would absolutely love to see your config JSON.  mine reports brightness to homekit splendidly, but homekit doesn't recognize it as a controllable device... I can't even toggle on/off through HK, it only reports the state.
 
thank you, I am concurrently learning homebridge, Mqtt, Tasmota, and everything else involved.
 
will post again tomorrow, cheers
 
Welcome to the cocoontech forum @reverendalc
 
Relating to 
 
Tasmota minimal uploaded - OK
Tasmota scripting uploaded - OK
template/script imported - OK
 
You do not need the scripting firmware or template / script imported with most currently posted firmware.
 
Tasmota_v9.0.0.3_GS1.2

  1. Load it (probably need to load the minimal FW first due to the size)

  2. Reset settings with 'reset 6'

  3. In configurations select 'Gosund Dimmer (76)"
 
Thanks!  man this 1post/1day limitation is killing me.
 
so my first switch is being a real chore.  it's super finicky about which firmwares it will load and when it will load them.  I have been entirely unable to load the minimal or custom bin linked above, only normal Tasmota and scripting Tasmota.
 
 I've yet to determine a rhyme/reason for that.  I grabbed a second switch (out of my 4pack) and it worked perfectly:
 
tuya-convert
upload minimal
upload custom bin
     reset 6
     GD76 template
satisfaction!
 
I am back to my first dimmer, which will not accept the very same minimal bin I used on switch 2.  I just got it to accept the minimal from http://ota.tasmota.com/tasmota/release/tasmota.bin.gz
so I'm thankful for that, and how I'm battling with the custom bin... actually I just got it.  for anybody else caught up in this senseless loop of flashing success/failure...
 
I chose the cloud FW upgrade from:
 
then I had to redownload the custom bin from:
 http://ota.tasmota.com/tasmota/release/tasmota.bin.gz
I'm not sure why I was able to upload the file once and only once, but redownloading and upgrading after downloading the minimal bin (via Tasmota's OTA interface) again worked
Tasmota_v9.0.0.3_GS1.2
 
in summation, I've now got 2/2 switches successfully operating.
 
I have to say, I really love these gosund switches for their ease of use and flexibility, but the build quality is acceptable at best.  at least they're not phoning home to china now!  can anybody suggest a currently available wall socket? I'd prefer a flashable unit with separate controls for socket 1 and 2, instead of stuffing a sonoff or shelly1 behind the receptacle.
 
looking forward to my next post...
 
reverendalc said:
reverendalc, on 11 Jan 2021 - 14:24, said:

I'm not sure why I was able to upload the file once and only once, but redownloading and upgrading after downloading the minimal bin (via Tasmota's OTA interface) again worked
The normal Tasmota firmware is so large now that it takes up most of the available space on these IOT switches. This means that once Tasmota is flashed, the only way to flash another version of Tasmota is to first flash the "minimal" version of Tasmota. This small firmware version has all of the functionality striped out, but it is small enough to allow the larger firmware version to be flashed. There simply isn't enough room to flash a regular Tasmota firmware on top of an existing regular Tasmota firmware (at least on this hardware). The original firmware is small enough that you can flash a full Tasmota firmware version directly without having to flash the minimal version first. This is why you were able to flash the firmware one time without issues.

If you use the web GUI to update the firmware, the system is smart enough to do all of this for you. If you watch the system, it actually flashes the minimal version first and then flashes the desired version. However if you are using Tasmotize or some other flashing software, this doesn't happen automatically. This is why you had troubles until you flashed the minimal version prior to trying to flash an upgrade.

In the future, I would suggest using the web GUI to flash future updates. This should handle everything automatically and make things easier. Just be sure to let the entire upgrade process occur. Sometimes people will want to unplug devices after the minimal version is flashed thinking it has finished. You obviously need to let it flash itself fully and generally speaking the device will restart multiple times because of the multiple flashes the system is actually doing.

Hopefully that all makes sense.

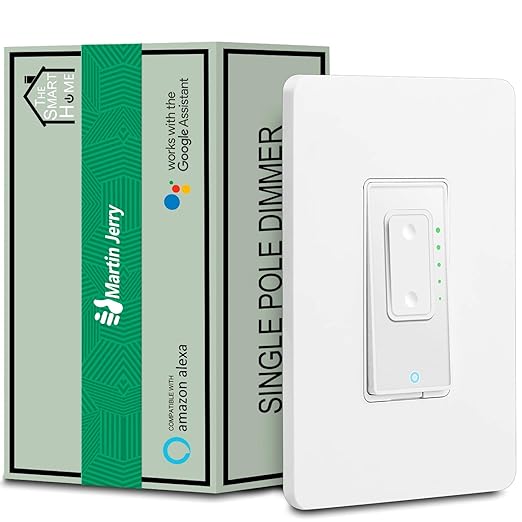
I myself have really gotten into Tasmota over the last month or two. I am in the process of replacing many of my switches with Martin Jerry switches. I really like their three button dimmer switches because you can program the two "dimmer" buttons to trigger other things. In many rooms we have devices plugged into wifi plugs and now we can program these extra switch buttons to turn on/off those devices too. So the main switch still turns on the main light, but the other two buttons can control two totally different lights/devices. (Actually I think you could have up to 6 different functions because you can program a "long press" as well on the three buttons).The dimming functionality of the main load still works too, so you don't loose any functionality doing this.

71vaQT1xpFL._SX522_.jpg


Also, if you haven't discovered "Device Groups", I suggest you read up about them on the Tasmota github (https://tasmota.github.io/docs/Device-Groups/). This concept allows you to "gang" several devices together so that Tasmota will sync the devices, status, dimming levels and color, etc. This is very helpful when you want to control a device from more than one switch (mirroring the functionality of a 3 or 4 way switch for example), or you have more than one device that you want to control from a single switch (a group of "smart" light bulbs for example).

In the past, the only lighting control I had in my home was one of these ganging situations where I needed three switches to control two groups of lights and all be synced with each other.  I used my home automation system to handle it, but now I let Tasmota handle it because functionality is guaranteed this way. In the past, if my automation system went down for some reason, these "ganging" scenarios would stop working. Now as long as the switches have power, the ganging feature will work. It's really helpful.

In reality, it's this "device group" function along with the added "PWM dimmer switch" options (https://tasmota.github.io/docs/PWM-dimmer-switch/) that allow me to program the buttons on the dimmer switch to do other functions.

It's pretty cool what you can do, especially for the relatively low price ($20 or less per switch - a set of four is less than $17/switch on Amazon). I had held off doing a lot of lighting control because I didn't want to pay $100-150 per switch which is what a lot of the "professional level" lighting automation systems run. Now I think Tasmota offers just as much if not more control for a fraction of the cost. I'm hooked for sure!
 
I really appreciate the efforts. I was pulling my hair out with this switch as it’s very different than their regular relays. I have it working with the script which I’d prefer in order to stay with stock tasmota.

Does anyone have ideas on lowering the minimum dim level? This one starts out extremely bright as compared to the dimmer it replaced. It’s almost like the range is reduced so 1 on this switch is like 30-40% on the old switch.

reverendalc: I’ve had good luck with Gosund outlet switches such as the WP3 and have quite a few in use. However, Ive read they have apparently started migrating some devices to Realtek chips which are not compatible with tasmota. I’m looking at alternatives as well and will probably look at the plugs from Martin Jerry. They look exactly the same and I’m told run tuya that can be flashed ota.
 
I am now about 90% done outfitting my home with gosund switches. Theyre all ks602gs toggle switches, except for four SW02 dimmers. Im actually using dimmers in a 3way and 4way setup using tasmota device groups to sync the states across all switches (only one switch sends voltage to the fixture). Its probably the coolest thing in the world to watch the dimmer switch at the end of the hall mirror the adjustments youre making on the other switch!

I do hope that somebody smarter than me can help with an issue though... I would like the PWR LED to stay lit green when the switch is on.
 
attached is a pic (yeah, I broke my drywall a lil bit lol):

My wife is giving me grief because the switches dont match and all of the old dumb decora switches matched. The LED lights up green briefly when the switch is powered on, but then reverts to white.  I don't think the switch can do red (to match the KS602's "off" state), but as similar in appearance as I can get them, the more likely I am to be allowed to continue screwing up my house with gadgets.

Also FWIW, a little bit of paint and/or electrical tape inside the switches will stop the light bleed that makes the switches look kind of cheap.
 

Attachments

  • IMG_1132.jpg
    IMG_1132.jpg
    99 KB · Views: 3
BUMP -
 
the firmware on this thread is awesome and works great, but does anybody know how to manipulate the LED to illuminate green when on?
 
cheers
 
Googled here on Tasmota commands.
 
You have to find out which GPIO controls LED color then edit the firmware or write out the commands or script it.
 
reverendalc said:
Yes, but I dont really understand any of that, and so many smart people on this thread clearly do understand lol
 
Log into the Tasmota GUI for that device.  Go to the Configuration/Configure Template page.  You should see all the GPIO pins listed with some having different buttons, LEDs, or relays assigned to them.  
 
Given your description of the functionality of the switch, I think you should be able to look at the pins that have LEDs assigned to them (Led_i).  Those LEDs will be assigned a number in the far right column with each pin/LED being assigned a different number (which references the actual LED color).  While I haven't tried it myself, I think you can just change the LED number to another one to change the color.  So I would try assigning all of the LED numbers to be the same - number 1 to start.  Then toggle the switch and see what color it is when on (it really should be the same color LED for any status at this point, but check the "on" status just to be sure).  If it isn't green, then go back and change the numbers all to 2, then 3, etc until you find the color you want.
 
Once that is done, your switch is probably showing green for all the status events.  I want to reset the template back to the stock configuration and then change one LED pin at a time to whatever the green color number was that you found.  Go back to the switch and see if the switch is green when on.  If not, go back and change that LED pin back to the stock number and change the next LED pin to the green number, etc, etc, etc.  
 
It will obviously take some trial and error, but I believe this method will allow you to find the green color and then assign it to be the color when on instead of white.  I haven't tested this myself, but in theory this should all work.
 
Back
Top